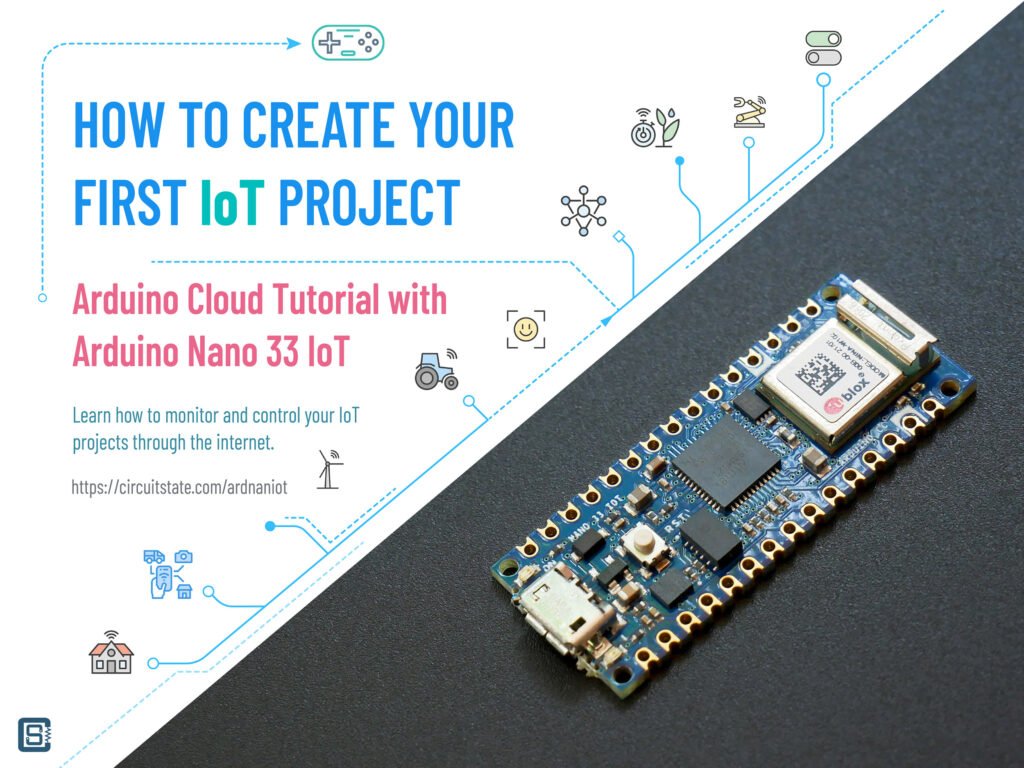
How to Create Your First IoT Project – Arduino Cloud Tutorial with Arduino Nano 33 IoT
Learn how to connect your Arduino Nano 33 IoT to Arduino IoT Cloud and create your first Internet of Things (IoT) project.
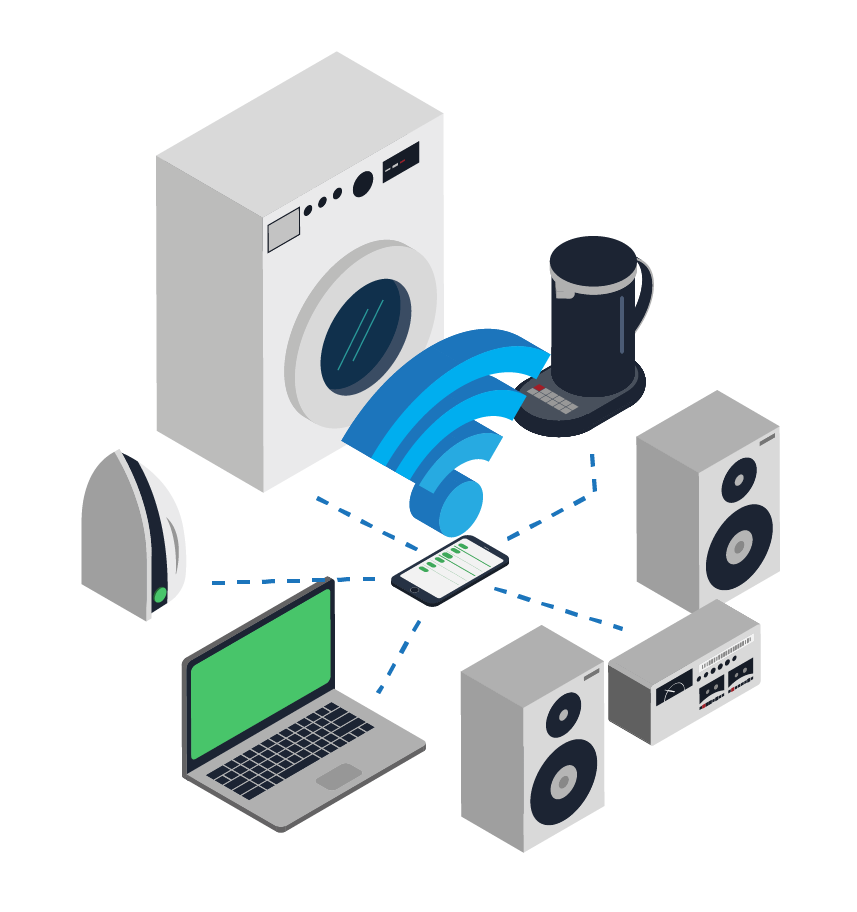
Conventional internet mainly consists of servers that store and deliver web content to a large number of users who access the content from their personal devices such as desktops, laptops, and smartphones. IoT stands for Internet of Things. It is the realm of computer networking when devices other than your personal computers get connected to the internet. The “thing” can be your table lamp for example or your washing machine. But why do you need to connect such things to the internet?
Connecting your electronic devices to the internet has many benefits. Most of the devices we use in our everyday lives have some kind of embedded sensors in them to monitor their operations and notify us about their status. Every sensor generates some kind of data, such as temperature, humidity, proximity, etc. We can use this data to precisely control various processes and automate them. Automation helps to increase the efficiency of processes and reduce wastage of resources. But in order to do that, we need to store and process the data somewhere and we need a network to transfer the data from one place to another. The internet is the best network suited for this. Our lives have become much smarter with the help of high-speed internet access and powerful computers such as the smartphones we use. So wouldn’t it be smarter and easier if you could remotely monitor and control your home appliances and other devices from your smartphone? The Internet of Things (IoT) is a network of internet-connected devices that generate, store, process, or output data, and communicate via the internet.
We can develop IoT applications for you
CIRCUITSTATE can develop and deploy IoT applications using industry-leading hardware, software, and cloud frameworks including AWS, Azure, Google IoT, Arduino IoT, ThingSpeak, Kaa IoT, Particle, etc. Contact us today to share your requirements.
How does IoT Work?
An IoT system consists of multiple layers of devices and networks. The devices also run different software stacks and employ different protocols for communication. The main building blocks of an IoT system are,
IoT Endpoints
This is where data is either data is generated or output is delivered. It can be embedded sensors that generate data or actuators that move according to the commands from the IoT device or displays that show status and accept inputs from a user. It is the most visible and interactive part of the IoT ecosystem. For example, if you have a smart RGB lamp in your room, you can control the color of the light by adjusting it from your smartphone. The effect of the action you make on your smartphone reflects where the light is. The IoT endpoint is not just limited to single devices but can also be a localized network such as a mesh that collects data and transmits them in a collaborative fashion.
IoT & Edge Nodes
What differentiates IoT endpoints from other parts of the network is that they do not access the internet directly. Instead, the data collected from the endpoints is accumulated at an IoT node or Edge device. An IoT node can send and receive data from multiple IoT endpoints and store or process them before sending them to a cloud network. Most times, the IoT endpoints come combined with an IoT node that can make a direct connection to the cloud. The IoT node will have enough storage and computing power to accomplish such small tasks. Low-power and low-throughput microcontrollers are used in IoT node devices. The heavy lifting will be done by the cloud servers.
But what happens when the device loses connection to the internet? It can no longer send data to the cloud for real-time monitoring and can not receive any inputs from the cloud. A critical system may fail if it doesn’t timely receive inputs from the cloud. IoT Edge Nodes are devices that are capable of supervising multiple IoT Nodes. The edge device can store and process large amounts of data even when it is offline. Edge devices use high-performance processors and software stacks to accomplish this. For example, edge devices can process large volumes of data collected from the IoT nodes and run the data through Machine Learning (ML) models to predict events and send inputs to the nodes accordingly. Not all IoT applications need edge computing devices if the application doesn’t generate large amounts of data (such as from a camera) or if it can tolerate frequent disconnections from the internet.
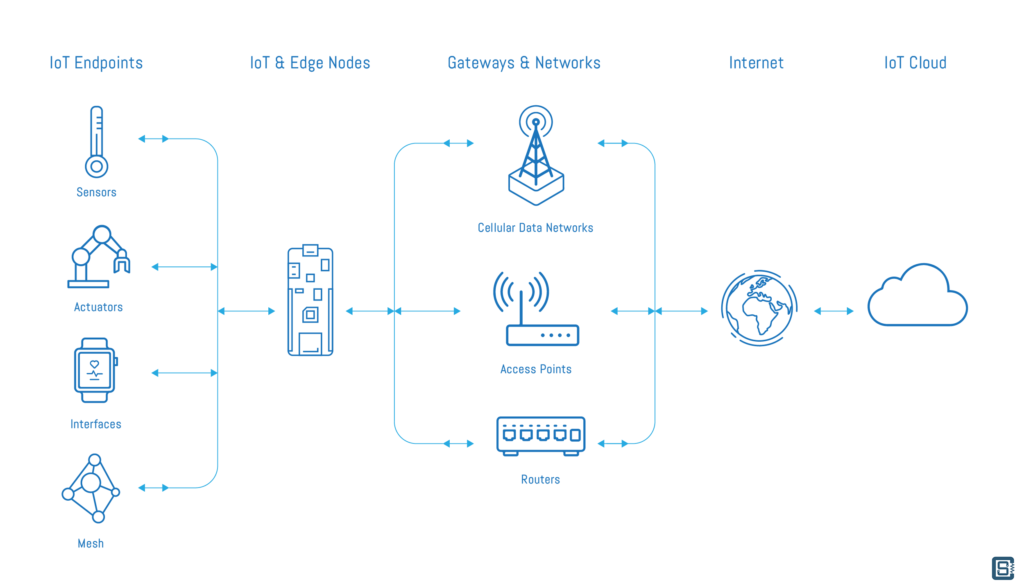
Gateways & Networks
The internet connectivity of IoT devices is generally implemented as a wireless connection to an internet access point, such as a Wi-Fi router. The devices will have small low-power Wi-Fi modules that access the network and thereby the internet. The data generated by IoT devices are usually small in size, and therefore the bandwidth needed is also much smaller. This is unlike personal devices such as laptops, which need more data bandwidth to carry out their tasks. IoT devices are also low power so they can be battery powered and made portable. Other than Wi-Fi routers, an IoT device can establish an internet connection through a wired internet gateway or cellular networks. With the help of a cellular data modem and SIM, an IoT device can connect to the internet via 2G (GPRS), 3G, or 4G LTE networks. Cellular data networks may be the best option for widely distributed IoT nodes in remote areas. LTE-M and NB-IoT are dedicated 4G technologies intended for low-power IoT device networks.
IoT Cloud
All IoT devices eventually connect to a server through the internet. The server hosts an IoT management core where you can set up new devices and manage communications between them. Access to the IoT platform can be either through a native dashboard or through APIs. The platform can act as a simple gateway for device device-to-device communication (such as MQTT messaging) or as a real-time data processing platform to run complex applications involving Artificial Intelligence and data analytics. Some IoT platforms are fully managed, which means they include a complete set of tools required to securely connect, transfer, store, and process data in the cloud. Some components of an IoT platform can be self-hosted, such as an MQTT broker. MQTT and HTTP are the most widely used communication protocols used by IoT devices to access the IoT cloud. MQTT is a simple messaging protocol specially designed for IoT applications. You can learn more about MQTT from SparkFun. Let’s list a few applications of an IoT cloud.
- Smart Home
- Self-driving Vehicles
- Intelligent Digital Assistants
- Smart Agriculture
- Smart Wearables, Fitness & Healthcare
- Smart Sensor Networks
- Industrial Communication, Production, and Maintenance
- Smart Cities
- Water & Waste Management
- Supply-chain Management
That’s basically everything we have been already doing, but now much smarter with the help of IoT.
What is Arduino IoT Cloud?
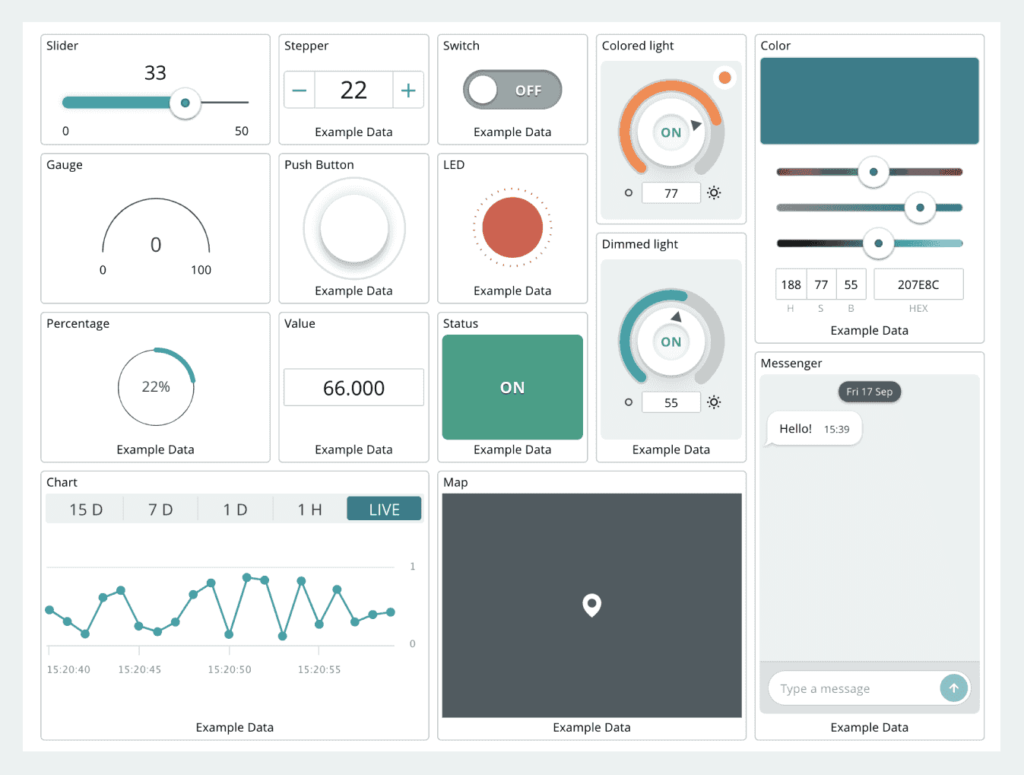
Arduino IoT Cloud is a platform dedicated to IoT devices and applications. You can connect your IoT devices to Arduino IoT Cloud, and use the cloud for saving embedded sensor data, remotely monitoring and controlling device operations, etc. Your IoT device needs an internet connection to access the Arduino IoT Cloud. The connection to the cloud will be established securely and therefore the data you are sending is always protected. Not only you can send data to the cloud but the cloud can also share the data to multiple devices near-instantaneously. Once the devices and cloud application are deployed, all you need is an internet-connected computer and browser to monitor and control your IoT devices. You can create beautiful dashboards with widgets with intuitive controls and visualization. The widgets can be linked to your code and uploaded to your IoT device right from the browser.
Why Arduino IoT Cloud?
Arduino IoT Cloud is not the only cloud service out there. There are other services like AWS IoT, Azure, Google Cloud IoT, etc. However, deploying them requires extensive knowledge of the workings of networking technologies, protocols, hardware, software, and communication technologies. Developing the software is also not easy. That’s where Arduino brings the difference. Creating a cloud application with Arduino IoT Cloud is as easy as using an Arduino IDE. The dashboard allows you to easily manage your IoT devices. Technology shouldn’t be daunting to a beginner or to a non-expert; that’s the core philosophy of Arduino. Just everyone should be able to make use of the magic of tiny programmable computing machines and sensors. But that’s not underrating. Arduino IoT Cloud is a powerful and scalable IoT ecosystem with the capabilities for deploying enterprise-grade solutions such as the Industrial Internet of Things (IIoT).
In this tutorial, we will learn how the Arduino IoT Cloud works, how you can connect your device to the cloud by creating a thing, how to communicate with the cloud, and how to create your first IoT application using the dashboard. The device we are going to use for this tutorial is the official Arduino Nano 33 IoT. It is a small breadboard-friendly board with a built-in Wi-Fi module. Let’s learn more about the board.
Arduino Nano 33 IoT
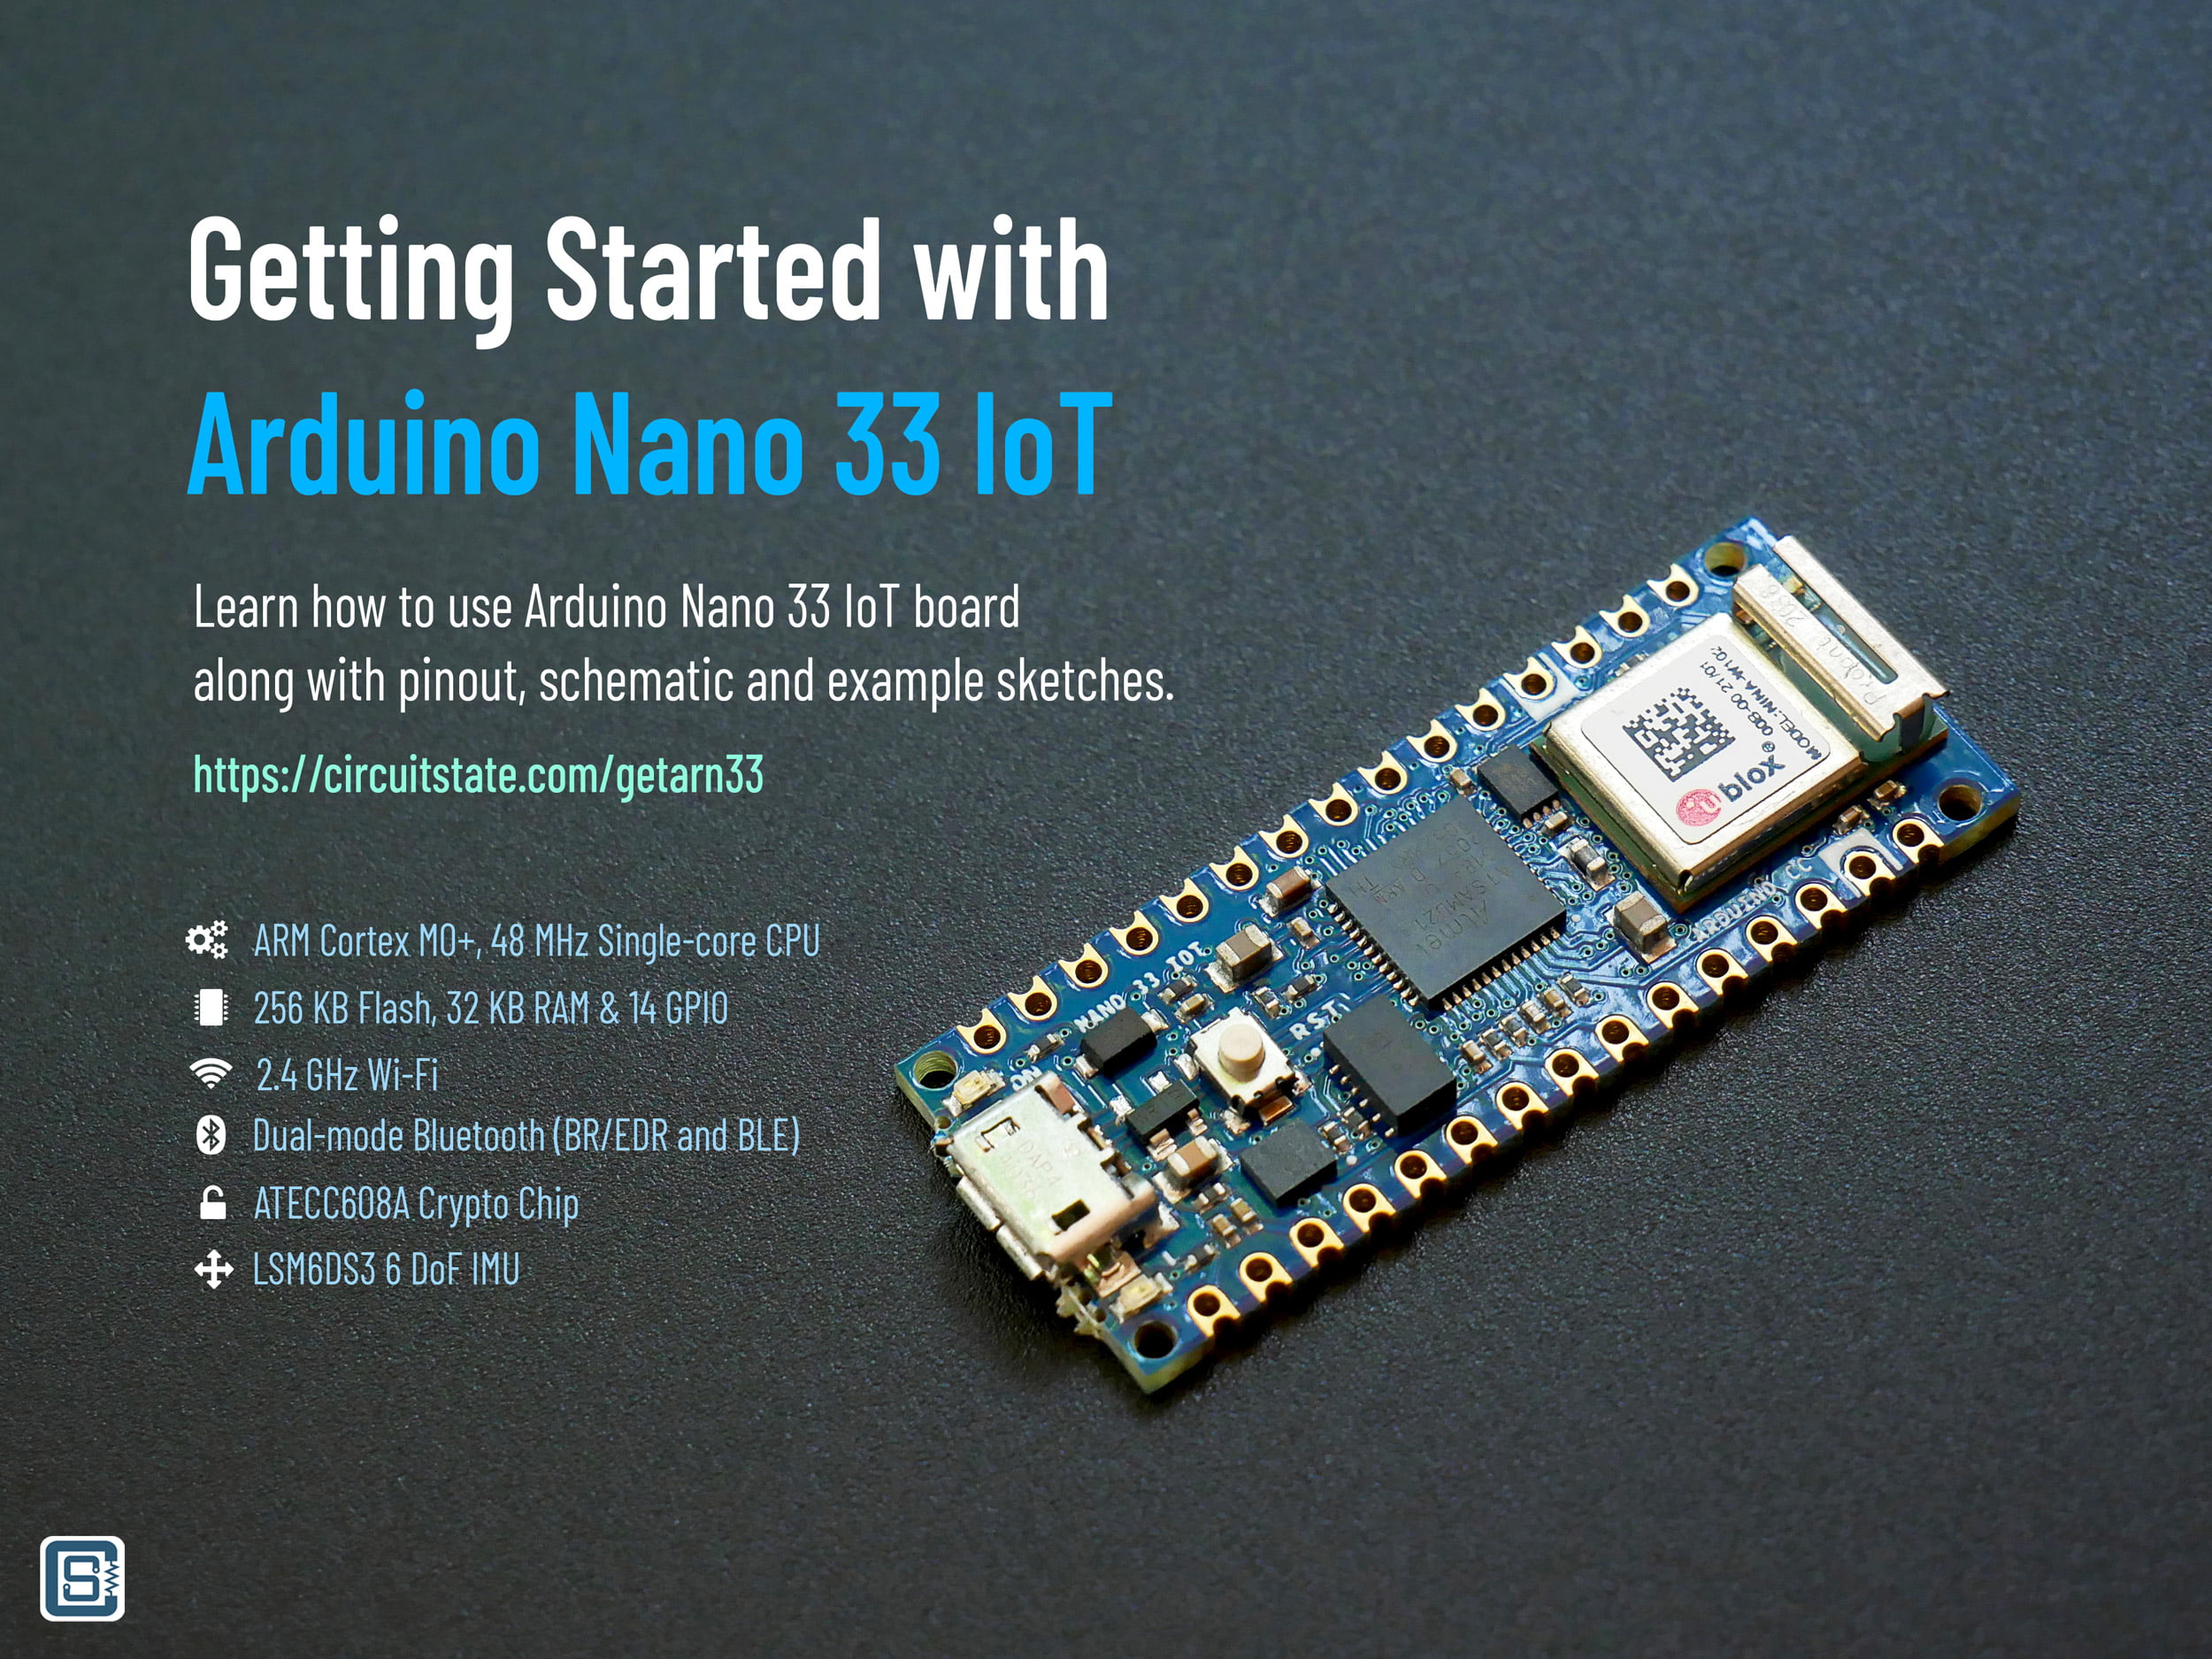
Arduino Nano 33 IoT is an official Wi-Fi-supported board from Arduino. It has the same form factor as that of the Arduino Nano, but uses a much more powerful ARM microcontroller. The SAMD21G18A is a single-core ARM Cortex-M0 microcontroller running at 48MHz. It comes with 1MB flash memory and 256KB SRAM. The connectivity module is the Nina W102 from uBlox which supports Wi-Fi and Bluetooth (BR/EDR, BLE). The communication to the cloud is secured with the help of a crypto chip ECC608 from Microchip. In addition to that, Nano 33 IoT also includes LSM6DS3 6-axis inertial measurement unit (IMU) from ST Microelectronics.
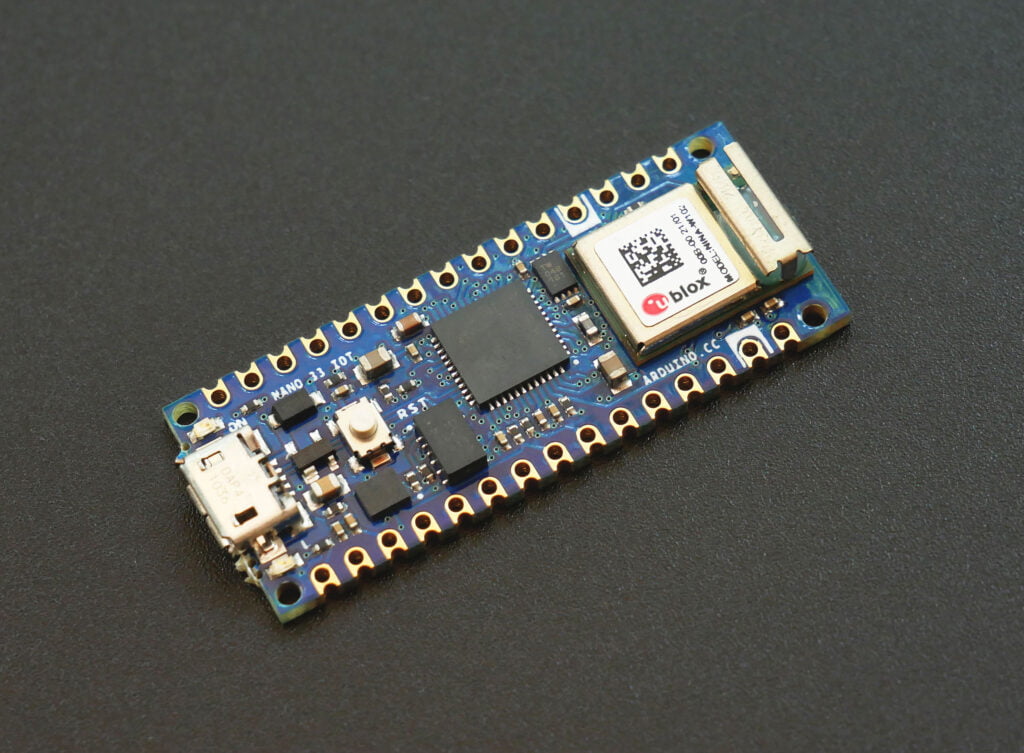
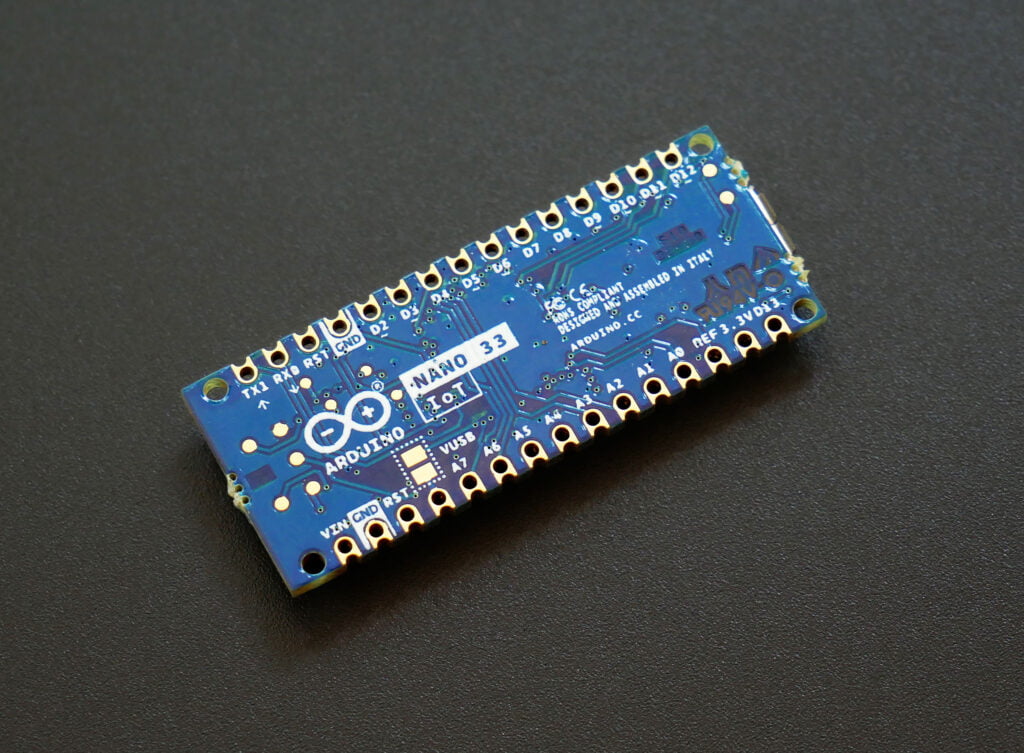
The Arduino Nano 33 IoT is specifically designed for IoT applications and therefore fully supported by the Arduino IoT Cloud out of the box. You can also connect your Nano 33 IoT to other IoT platforms such as AWS IoT, Blynk, IFFT, Firebase, and Azure. The board also supports OTA (Over-the-air) updates. It just costs $18 at the official Arduino store and around Rs.1900 in Indian stores. You can learn more about the Arduino Nano 33 IoT in a different post.
Getting Started with Arduino Nano 33 IoT Microcontroller Development Board – Pinout, Schematic & Example Programs
Setting up Nano 33 IoT
Before we begin, we have to set up the Arduino Nano 33 IoT in the Arduino IDE. First, we need to install the necessary packages so that we can compile and upload code to the Nano 33 IoT. There are multiple ways to flash code to the board.
Arduino IDE v1
This is the legacy desktop IDE we use to program all Arduino boards. The Nano board package has to be installed first. To do that open the Boards Manager from Tools → Board → Boards Manager. Then search for Nano 33 IoT and install the Arduino SAMD Boards (32-bits ARM Cortex-M0+) package. You need an internet connection for this.
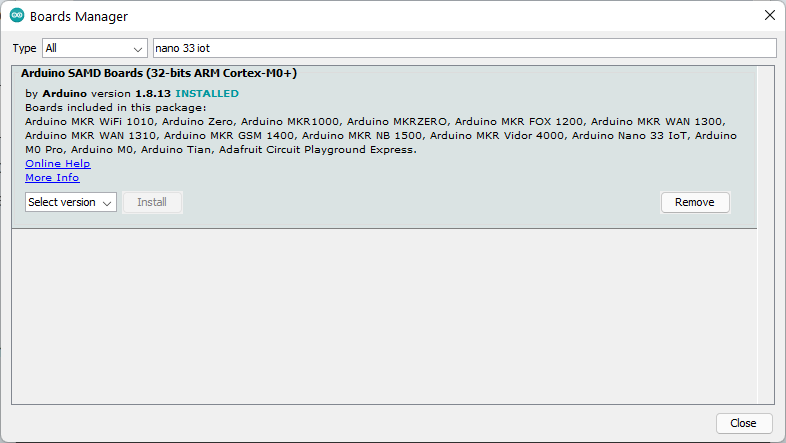
Note that the package is different from the regular SAMD package used for boards like Arduino Due. So you need to specifically install the Cortex-M0+ package. Once you have installed the package, a new list of boards will appear under Tools → Board → Arduino SAMD (32-bits ARM Cortex-M0+) Boards. Choose Arduino Nano 33 IoT from the list.
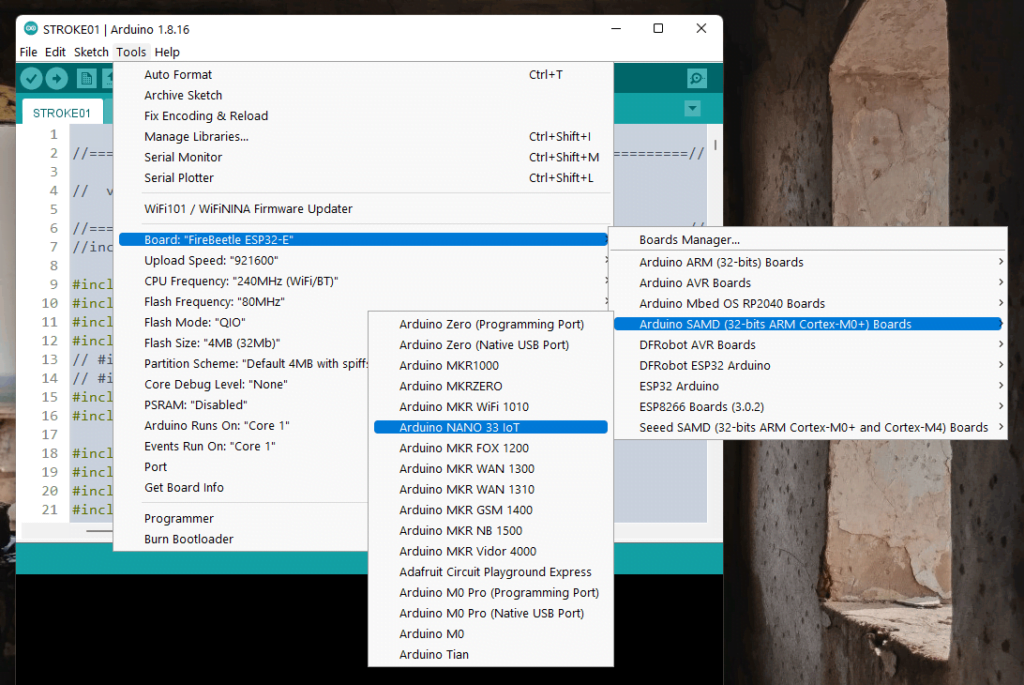
Now let’s test the board by uploading the Blink sketch to it. Open the example sketch from File → Examples → 01.Basics → Blink. Choose the port and upload the code to the Nano 33 IoT. The green LED should be blinking now. That means everything is working.
Arduino IDE v2
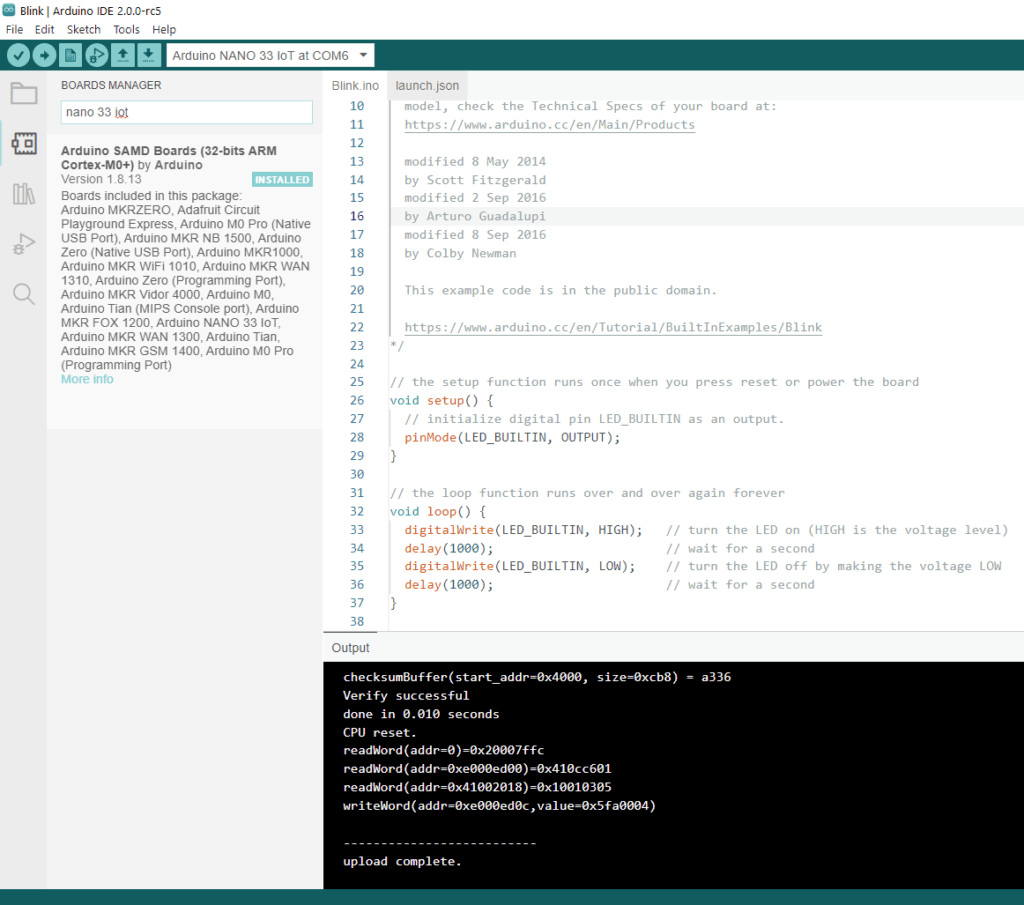
The steps to follow are almost similar to the IDE v1. Just search for “nano 33 iot” and install the package from the list. Then open the example and upload it to your board.
Adding Things
A device that directly connects to the Arduino IoT Cloud is called a Thing. In our case, this is the Arduino Nano 33 IoT board. To access the Arduino IoT Cloud, you need an account at Arduino. Sign up and create your free account first.
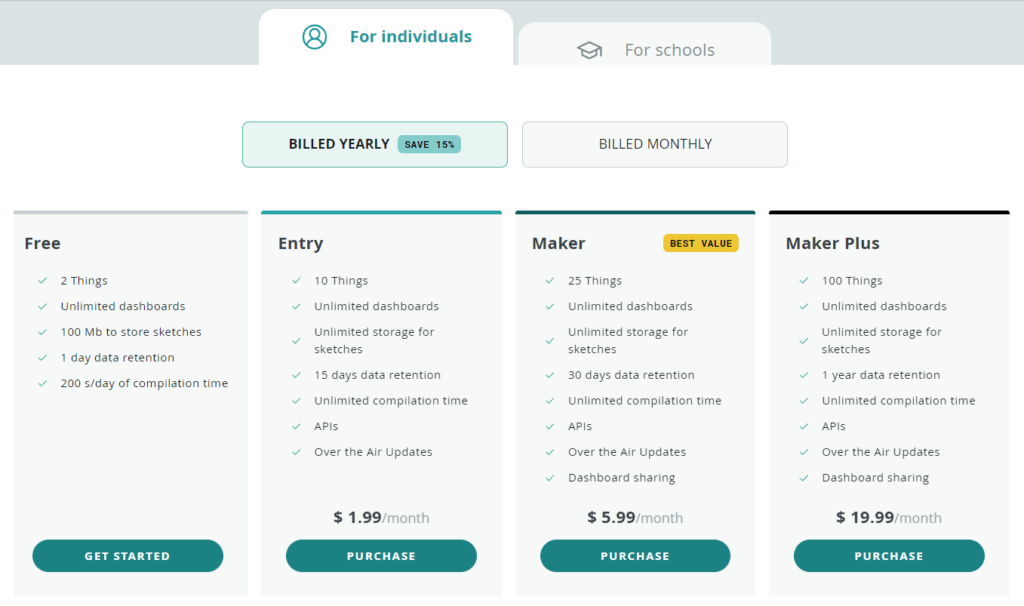
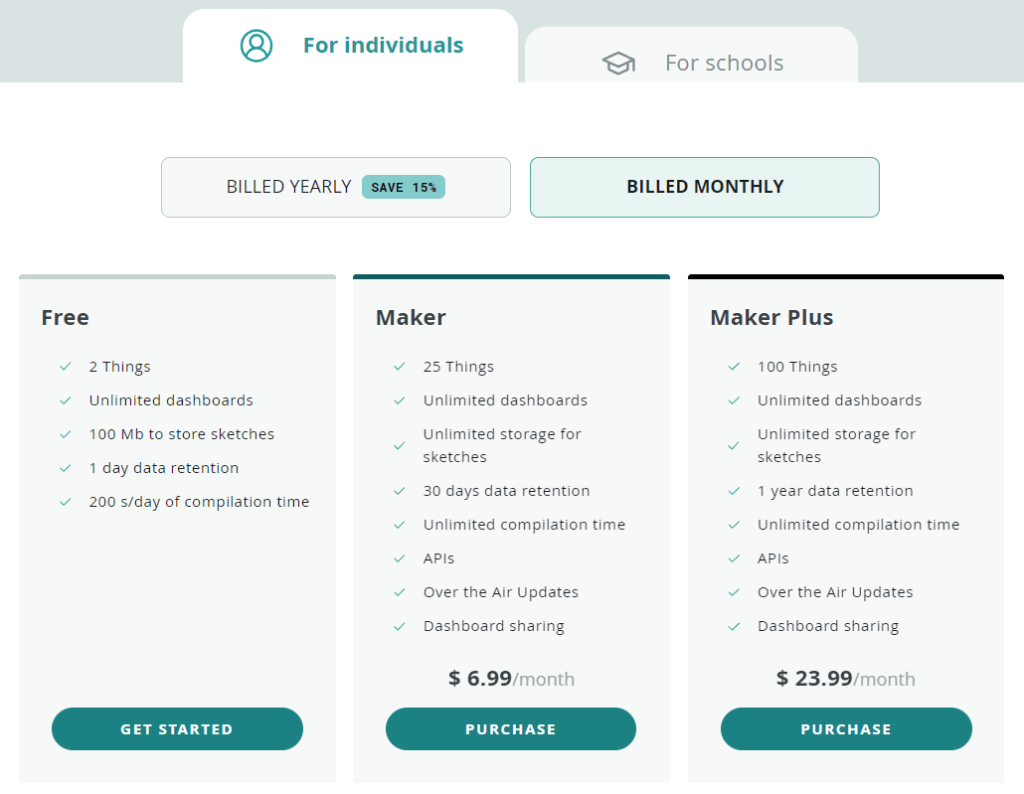
You can add up to 2 things in a free account and the data can be stored for up to 1 day. The storage space is limited to 100 MB and the compilation time is limited to 200 seconds per day. There are multiple paid options that allow you to add more things and retain data for longer periods. The following are the paid plans available as of writing this article.
Create Thing
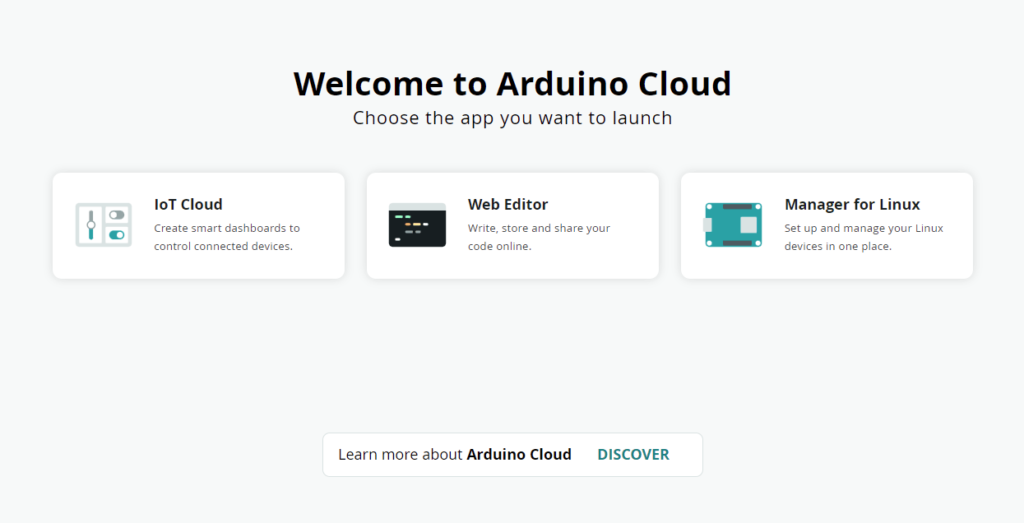
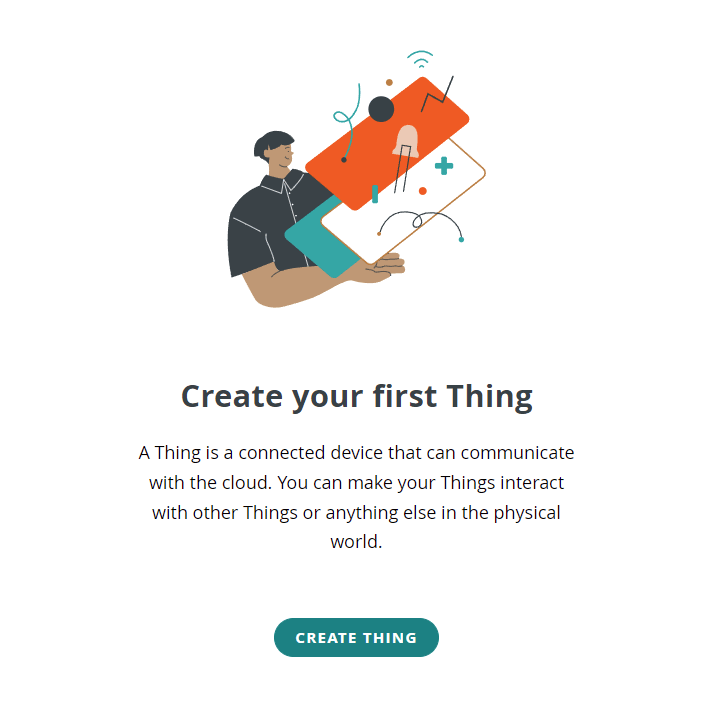
Once you have successfully signed up, go to your IoT control panel. In the things panel, click on the CREATE THING button to start creating a thing. All of your things will appear here once you have them.
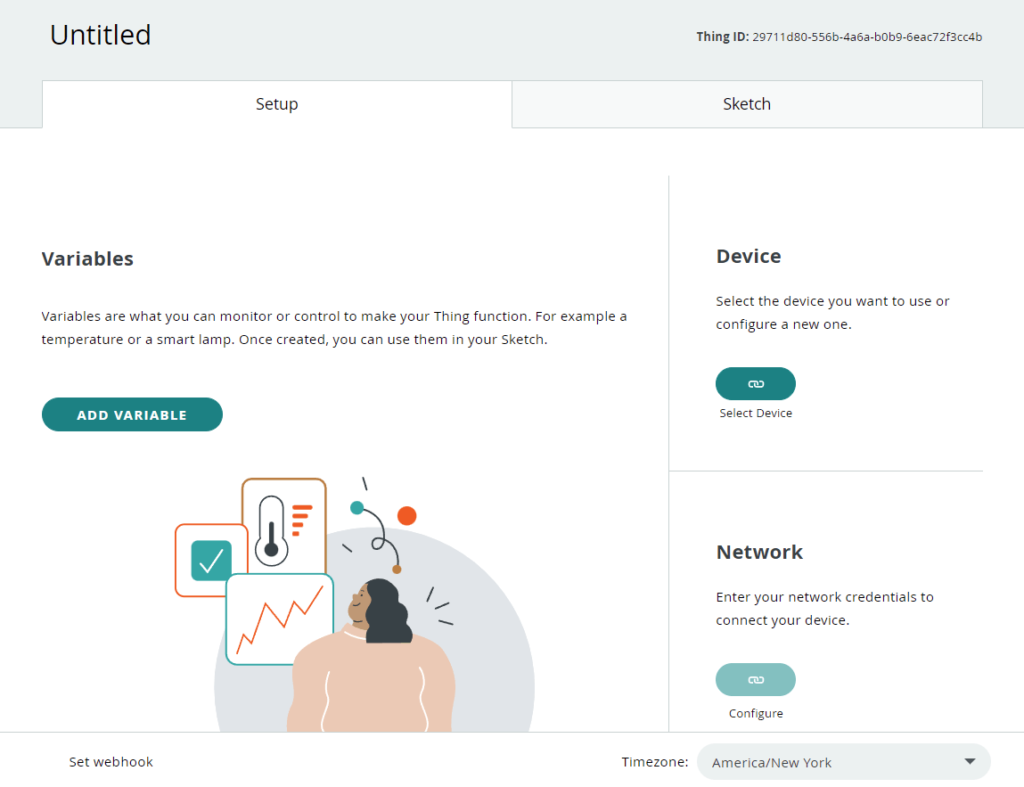
A new page will appear with the title Untitled and a few buttons. This is where you configure your thing and define its properties. All things are identified by their unique ID which is shown on the top right. First, rename the thing by clicking on the title. We will name it Nano-33-IoT.
Setup Device
Now click on the Select Device button under the Device section. This is where you link your actual device for setting it up. You must connect your Nano 33 IoT board to the computer now. The control panel will automatically detect the connected boards and show them as a list. But your computer needs to be running a small program called Arduino Create Agent. If you don’t have it installed, the window will prompt you to download and install it.
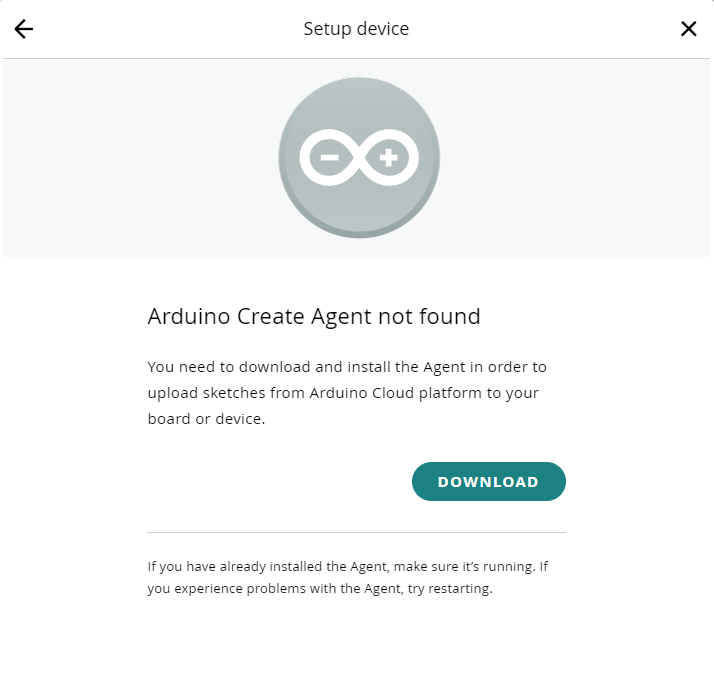
Install and run the Arduino Create Agent. It is a good idea to allow the application to autostart with the operating system. Once you have installed the Arduino Create Agent, you will be able to see the Nano 33 IoT board on the device list.
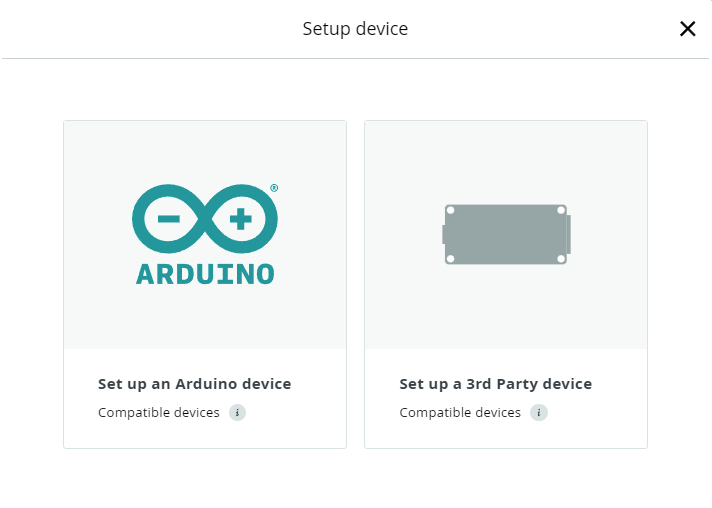
Since we are setting up an official Arduino board, click on the first option. The control panel will try to find the connected devices with the help of Create Agent.
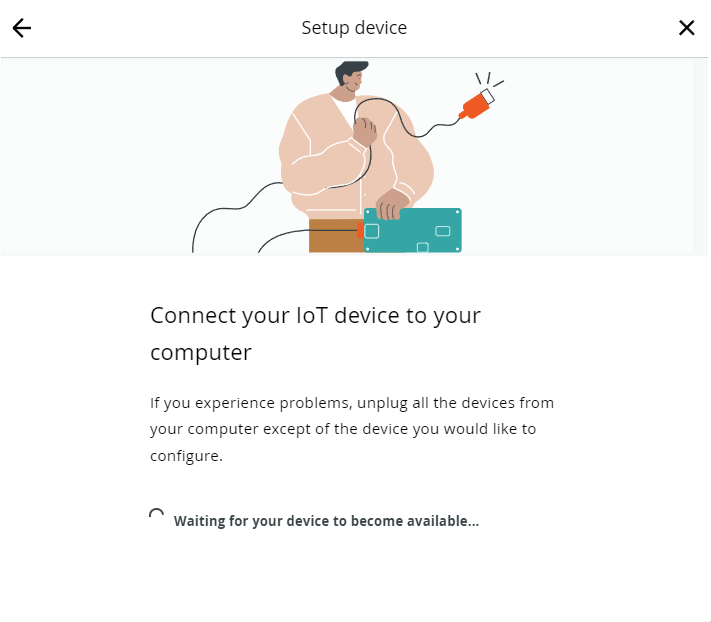
The device will show up in a few seconds if everything is done correctly. If you cannot find a device, try resetting your board and clicking the refresh button.
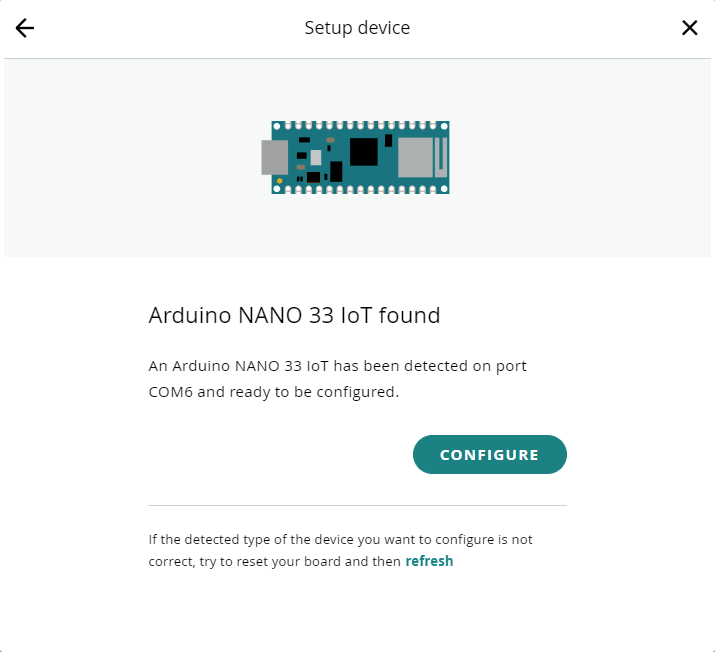
If the device is found, then click on the CONFIGURE button. This will simply read the device ID and save it for the future.
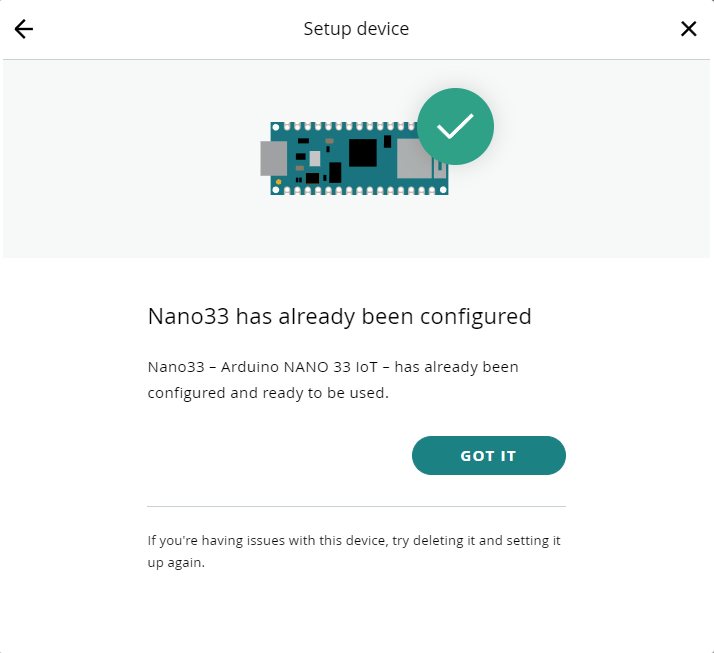
Associate Device
Once you finish configuring the device, you will be taken back to the thing creation window. Click again on the Select Device button. This time, the configured device will show up and you can associate the board with the thing you are creating.
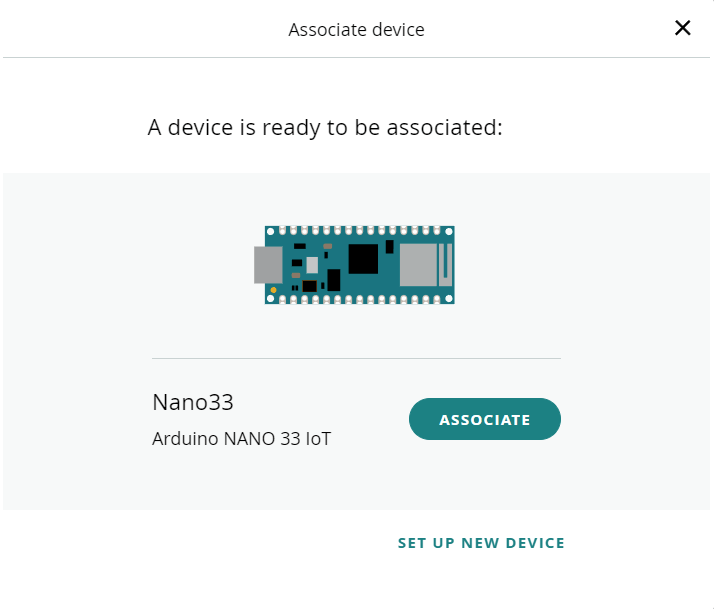
Once associated, the device will be assigned a unique ID. You can remove or change the association any time you want, independent of the thing you have created. You just need to configure the new device and upload the code associated with the thing.
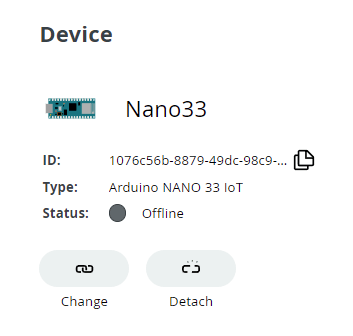
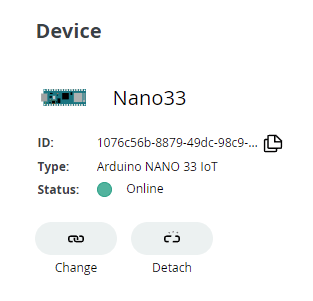
The status indicates whether or not the device is connected to the cloud right now. Since we have not uploaded the code and the device is not connected to the internet, the status will remain Offline. For the device to connect to the internet, we need to provide it with Wi-Fi credentials (SSID and password). This should be the network you are connecting your device to. But before that, we need to create variables.
Add Variable
A variable is a placeholder for any value that we can access and modify in the cloud. For example, you can have a variable named LED_Status in the cloud and access it from your device that is connected to the cloud. Accessing means you can read the current value of it or give it a new value. It is through the access of such variables that an IoT device can communicate to the IoT cloud.
To create a new variable, click the ADD VARIABLE button. A new window will pop up. Here we have to define the variable name that is used to identify it on the cloud dashboard, the type, declaration (the actual variable name as appears on the program), variable access permissions, update policy, and threshold.
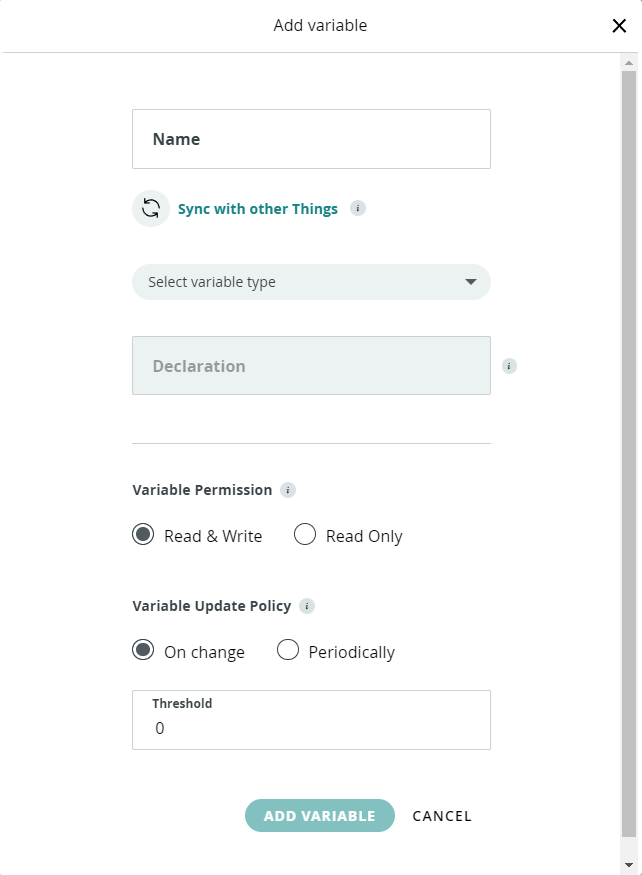
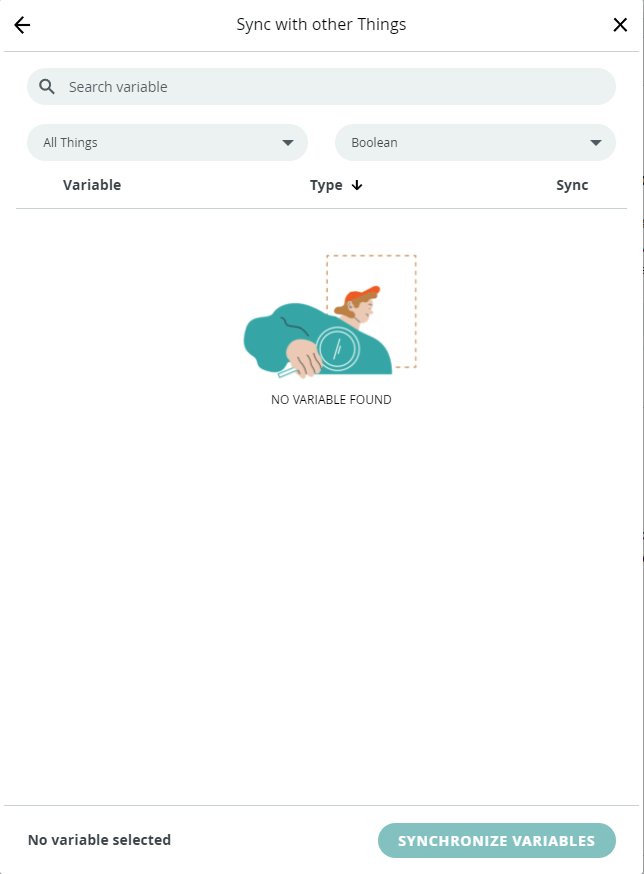
For the name, we will set it as LED. Sync with other Things is an option to allow other devices on your cloud account to access the new variable you are creating. This is useful when you want to share data generated by a device, with multiple other devices that are connected to the cloud. Sync is only possible with variables of the same type. Since we don’t have any other devices in our cloud account, we will leave this input empty.
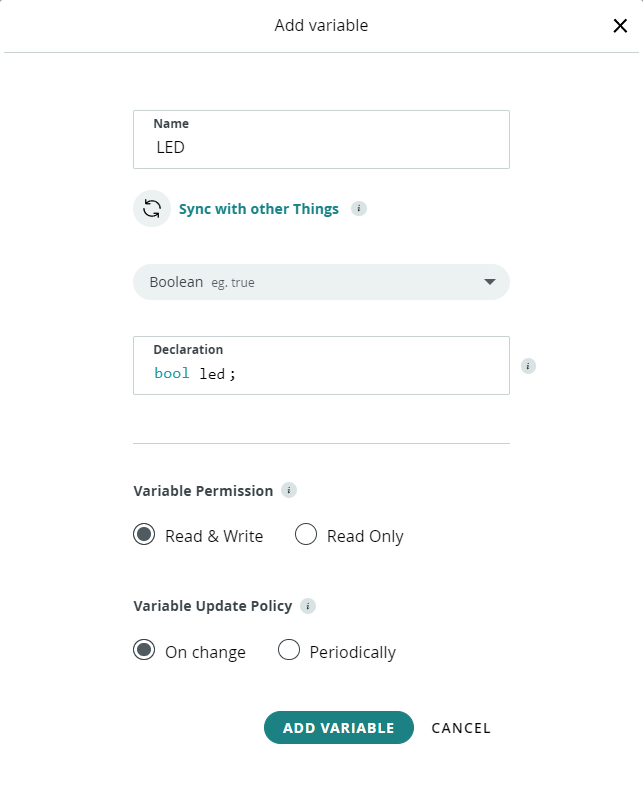
Since we want to control an LED using the variable, we can use the Boolean type which can only exist in two states. Boolean is available under Basic Types category. When we select the data type, the declaration will be automatically created. You can change it if you want, but it is always a good practice to give it a name that matches the variable name in the cloud. We will change the declaration to bool led;. Since we want to modify the value through a cloud connection, we must set the variable permission to Read & Write. But if we are sending data exclusively from the cloud to the device, we have to set the permission to Read, in order to prevent any accidental modifications. Finally, we have to define how often the variable should be updated. We can either update a variable periodically irrespective of any change in the actual value or update only when the value is changed. The latter reduces the number of times you have to access the cloud/device. Since we are using a bool variable, the threshold has no value here.
With that, we can finish adding the variable. The variable will now appear on the variable list. You can add more variables if you want. But a free Arduino IoT Cloud account can only have a maximum of 5 such variables. Paid plans can have more variables.
Add Network Credentials
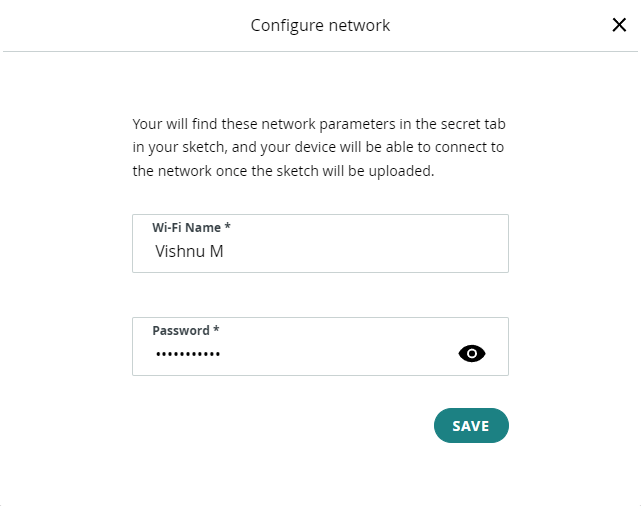
Now we have to add the Wi-Fi credentials to the device so that it can connect to the internet. Click on the Configure button on the Network section, and enter the Wi-Fi credentials of your Wi-Fi router. You can also change the time zone to the local one.
Uploading Sketch
An Arduino sketch will be automatically generated for your device. When you add new variables or modify the existing ones, the corresponding functions and variables will be automatically added to this sketch. The sketch we got is as follows,
/*
  Sketch generated by the Arduino IoT Cloud Thing "Nano-33-IoT"
  https://create.arduino.cc/cloud/things/29711d80-556b-4a6a-b0b9-6eac72f3cc4b

  Arduino IoT Cloud Variables description

  The following variables are automatically generated and updated when changes are made to the Thing

  bool led;

  Variables which are marked as READ/WRITE in the Cloud Thing will also have functions
  which are called when their values are changed from the Dashboard.
  These functions are generated with the Thing and added at the end of this sketch.
*/

#include "thingProperties.h"

void setup() {
  // Initialize serial and wait for port to open:
  Serial.begin(9600);
  // This delay gives the chance to wait for a Serial Monitor without blocking if none is found
  delay(1500);

  // Defined in thingProperties.h
  initProperties();

  // Connect to Arduino IoT Cloud
  ArduinoCloud.begin(ArduinoIoTPreferredConnection);

  /*
     The following function allows you to obtain more information
     related to the state of network and IoT Cloud connection and errors
     the higher number the more granular information you’ll get.
     The default is 0 (only errors).
     Maximum is 4
 */
  setDebugMessageLevel(2);
  ArduinoCloud.printDebugInfo();
}

void loop() {
  ArduinoCloud.update();
  // Your code here
}

/*
  Since Led is READ_WRITE variable, onLedChange() is
  executed every time a new value is received from IoT Cloud.
*/
void onLedChange()  {
  // Add your code here to act upon Led change
}The thingProperties.h header file contains the network credentials and other details. You can add your application code within the loop() function as usual. But make sure you don’t run any blocking code that blocks other parts of the program. This is because the function ArduinoCloud.update() has to be run periodically to send or receive data from the cloud. Functions such as delay() will create blocking code. The workaround is to use millis() or micros() function to determine the elapsed time and perform an action based on it. Or you could use ptScheduler Arduino library to make this job easier.
The onLedChange() is the callback function for the LED variable we created earlier. This function will be called whenever the cloud modifies the value of the variable. For example when you flip a switch on your IoT dashboard. Since we are going to control an LED from the IoT dashboard, let’s add the code for making the LED turn on and off, when a new value is received.
//=======================================================================//

#include "thingProperties.h"

//=======================================================================//

void setup() {
  // Initialize serial and wait for port to open:
  Serial.begin(9600);
  // This delay gives the chance to wait for a Serial Monitor without blocking if none is found
  delay(1500);
  // Defined in thingProperties.h
  initProperties();
  // Connect to Arduino IoT Cloud
  ArduinoCloud.begin(ArduinoIoTPreferredConnection);
  setDebugMessageLevel(2);
  ArduinoCloud.printDebugInfo();

  pinMode(LED_BUILTIN, OUTPUT);
}

//=======================================================================//

void loop() {
  ArduinoCloud.update();
  // Your code here
}

//=======================================================================//

void onLedChange()  {
  // Add your code here to act upon Led change
  if (led) {
    digitalWrite(LED_BUILTIN, HIGH);
  }
  else {
    digitalWrite(LED_BUILTIN, LOW);
  }
}

//=======================================================================//We are controlling the onboard LED and therefore used the LED_BUILTIN value for the digital pin. Now whenever the device receives an update from the cloud, it checks if the value of the variable led has changed. If it is true then we will turn on the LED and turn it off otherwise.
Now let’s upload the code to Nano 33 IoT. The board is already connected and detected by the editor. Simply press to start verifying the sketch and compile it.
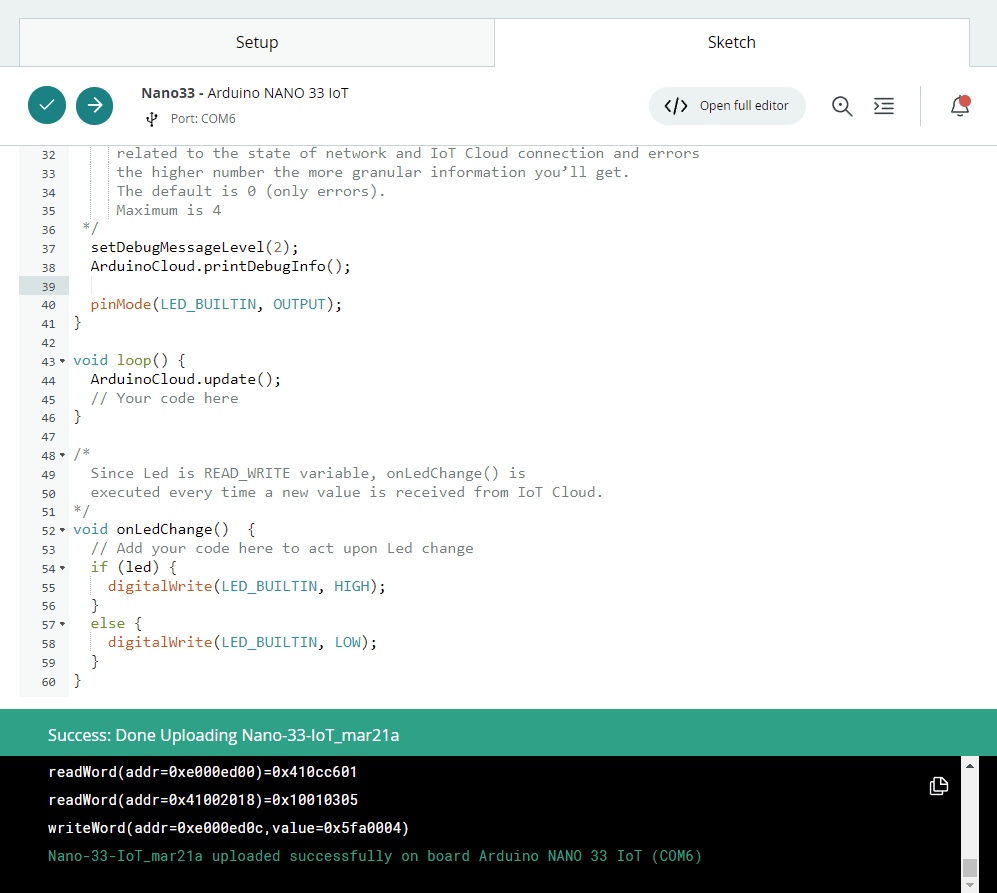
You can also upload the code from the Web Editor where you can see all the files that are part of the sketch. Once the code is uploaded, the device will try to establish an internet connection through Wi-Fi and connect to Arduino IoT Cloud. If the connection is successful, the device status will change to Online.
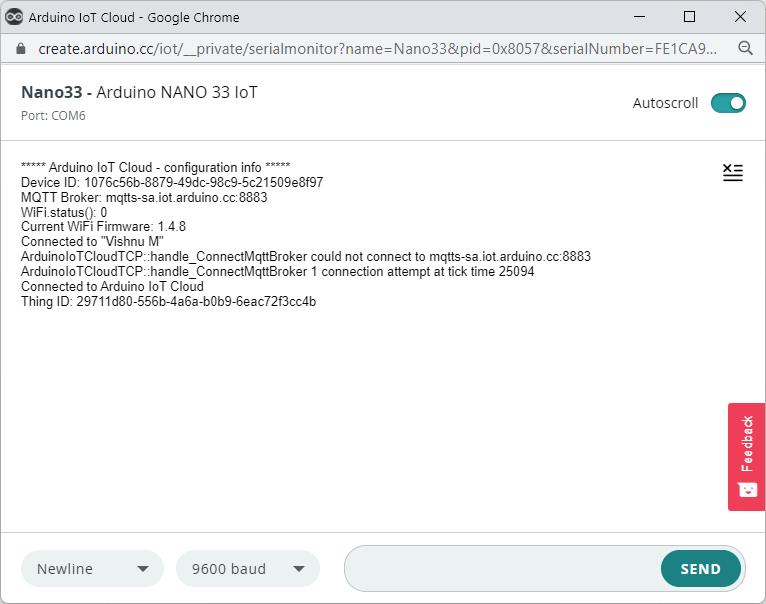
You can also monitor the device activity through the serial monitor. Reset your device to see the initial messages printed from network activity.
Creating Dashboard
Now head over to the Dashboards tab to start creating your first IoT dashboard. Click on the BUILD DASHBOARD button to get started.
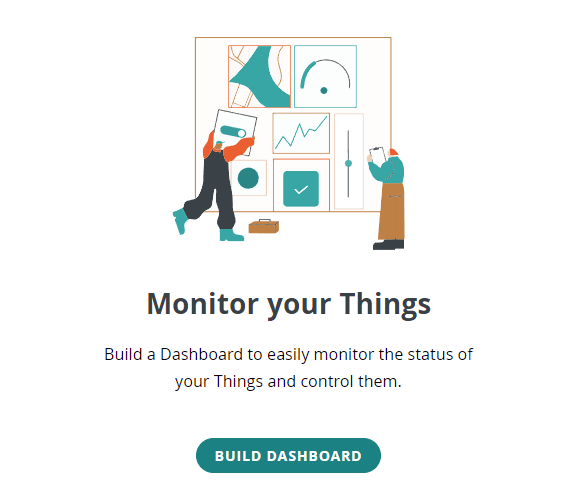
Give a name to your dashboard first. We have given the name LED-Control. Now click the ADD button to select and add a new widget to the dashboard. A widget is a graphical block that can either display an output or accept an input. We just need a simple switch to control our LED. Select the switch widget and place it in the dashboard area. Immediately, a new window will appear to configure the newly placed widget.
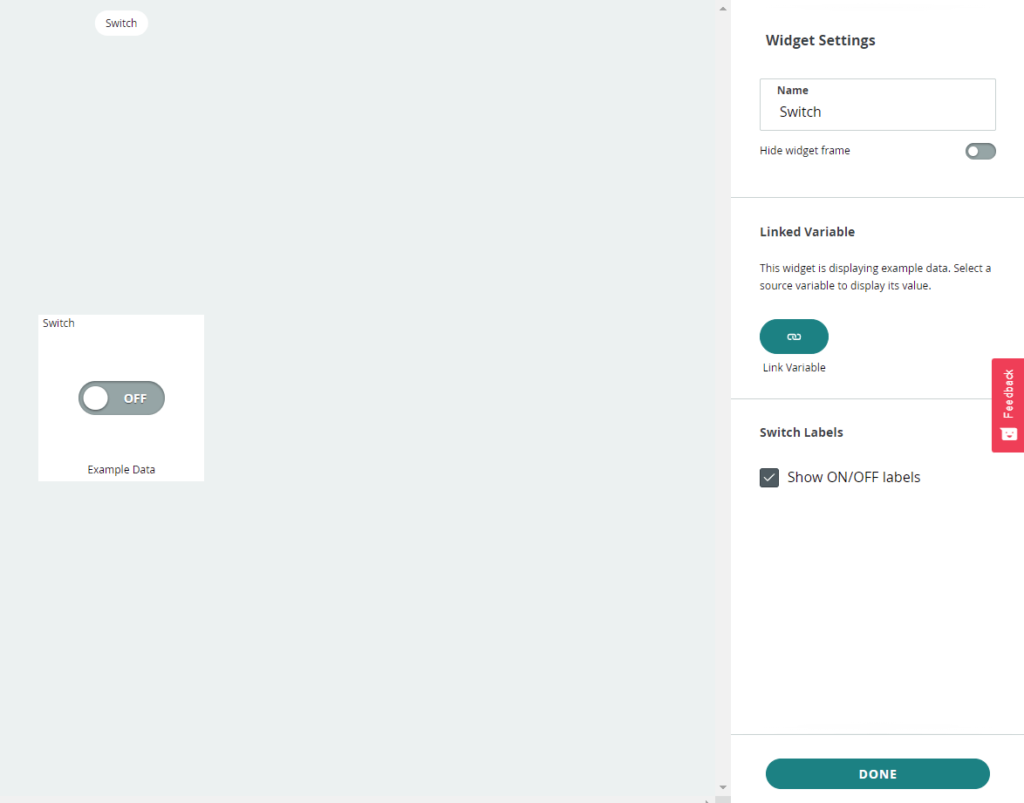
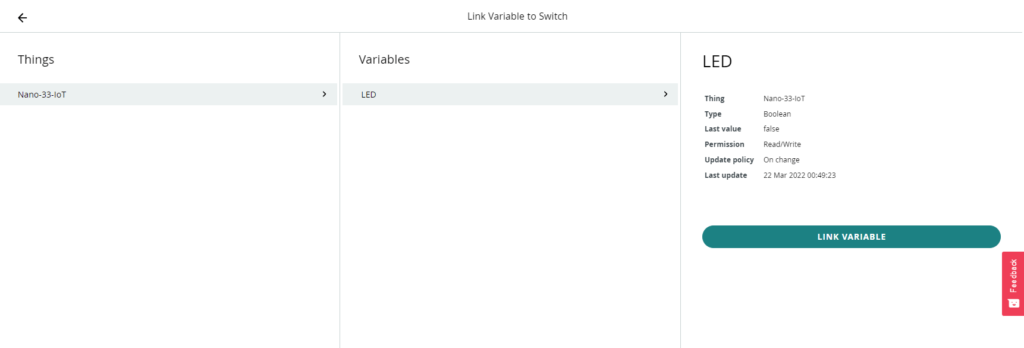
We can change the name of the widget if we want. We need to link this widget to one of the variables we have created before. We only have one variable as of now. Click the Link Variable button to get a list of Things and variables and select one from them.
As soon as you click Done, the widget will be placed on the dashboard and it will be ready for action. Simply click on the switch to toggle it. Also, monitor your device to see the LED turns on and off as you flip the switch. Hooray! Your first IoT Blinky 🥳
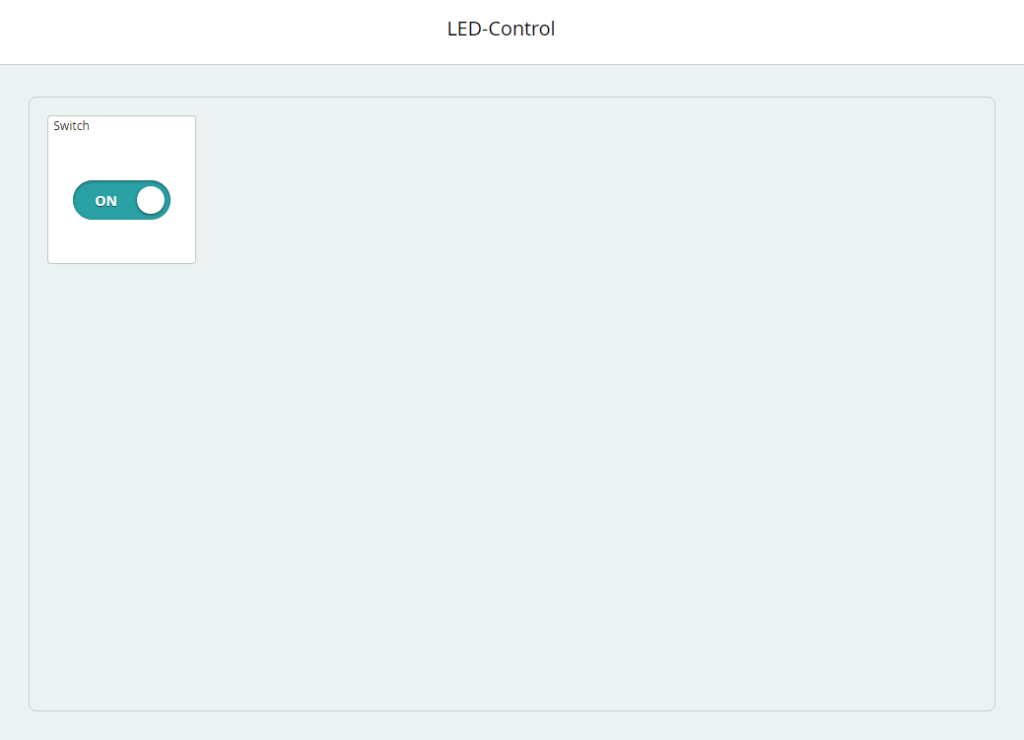
What we have created here is a very basic interface for controlling a simple LED. You can build more complex projects with the help of other widgets and other types of variables. Tinker around with them to find out what awesome things you can do with the Arduino IoT Cloud. We will come up with more IoT tutorials and projects in the near future.
Troubleshooting
Updating Wi-Fi Firmware
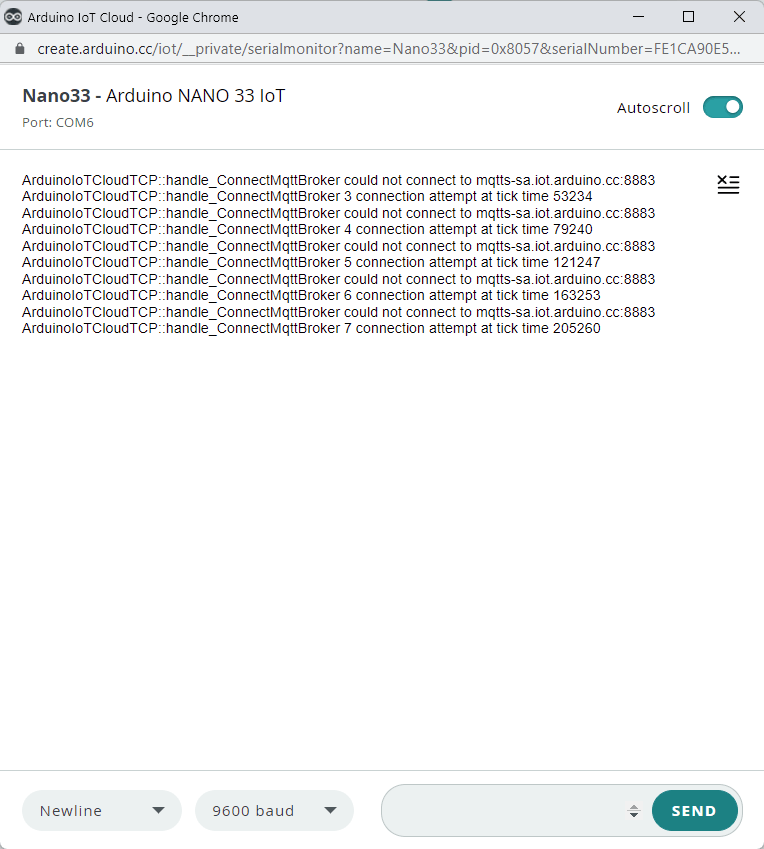
If your board does not have the latest Wi-Fi firmware, it might not be able to establish a connection to the cloud. The serial monitor will show an error message as,
ArduinoIoTCloudTCP::handle_ConnectMqttBroker could not connect to mqtts-sa.iot.arduino.cc:8883
ArduinoIoTCloudTCP::handle_ConnectMqttBroker 3 connection attempt at tick time 53234In that case, you need to update the Wi-Fi firmware manually. Arduino has a tutorial – Check and update the firmware for WiFiNINA and WiFi101 – to update the firmware. You don’t need any additional tools for updating.
Links
- Arduino IoT Cloud – Plans
- Arduino IoT Cloud – Create an Account
- Arduino Nano 33 IoT
- u-blox NINA-W102 – Datasheet
- ATECC608A – Datasheet
- Check and update the firmware for WiFiNINA and WiFi101
Short Link
- Short URL to this page – https://circuitstate.com/ardnaniot


In the IoT Cloud section, you say “MQTT is a simple messaging protocol specially designed for IoT applications. We will learn more about it later in this post.”
I don’t see any more information on MQTT “later in this post”.
Hey Chip, thanks for pointing out the mistake. The post was already too long once we completed the draft and we decided to not add a section for MQTT there. But we forgot to remove the reference you pointed out. This has been fixed. MQTT requires a dedicated tutorial and we will post one soon. For now, to follow the tutorial, and use your supported Arduino boards with the Arduino IoT Cloud, you don’t need a comprehensive knowlegde about MQTT. Instead, the communication is taken care by the Arduinno IoT cloud libraries and examples. Please let us know if you encounter any issues with that.
I am getting error message for
LED_BUILTINIOT CloudStart verifying/tmp/499868668/Untitled_2_jul04a/Untitled_2_jul04a.ino: In function 'void onLedChange()':
/tmp/499868668/Untitled_2_jul04a/Untitled_2_jul04a.ino:32:6: error: 'led' was not declared in this scope
if(led) {
^~~
Error during build: exit status 1
/tmp/499868668/Untitled_2_jul04a/Untitled_2_jul04a.ino: In function 'void onLedChange()':
/tmp/499868668/Untitled_2_jul04a/Untitled_2_jul04a.ino:32:6: error: 'led' was not declared in this scope
if(led) {
^~~
Error during build: exit status 1
That could be because the name of the variable you declared while adding the variable was different. In order to use the
ledvariable name, you must type “led” in the Declaration box when adding a new variable. Try editing the variable used for the LED.Thanks for the support. It’s working fine
Good one. Simplicity is the highlights. Recommended to non technical guys also. Keep posting new articles. Simplify advanced topics and present it.
Thanks for your support. And yes, we will definitely post more articles like these 😀