Creating C/C++ Projects for C-DAC Aries V3 THEJAS32 Microcontroller Board Using VEGA SDK
Learn how to use the VEGA SDK for creating and building C/C++ projects for C-DAC Aries V3 & other THEJAS32 RISC-V microcontroller boards.

In the last post, we introduced you the Aries V3 THEJAS32 microcontroller board indigenously developed from C-DAC. We used the official Arduino package for creating Arduino projects for the Aries V3. But what powers the Arduino framework package under the hood is the official VEGA SDK for all VEGA series processors. Since the Arduino IDE hides a lot of software development processes from the user, you don’t get to learn how everything works. In this tutorial, we will use the official VEGA SDK (a fork actually) to create and build C/C++ projects for your Aries V3 boards. We will also learn about the different ways you can upload firmware to your Aries boards.
Aries V3
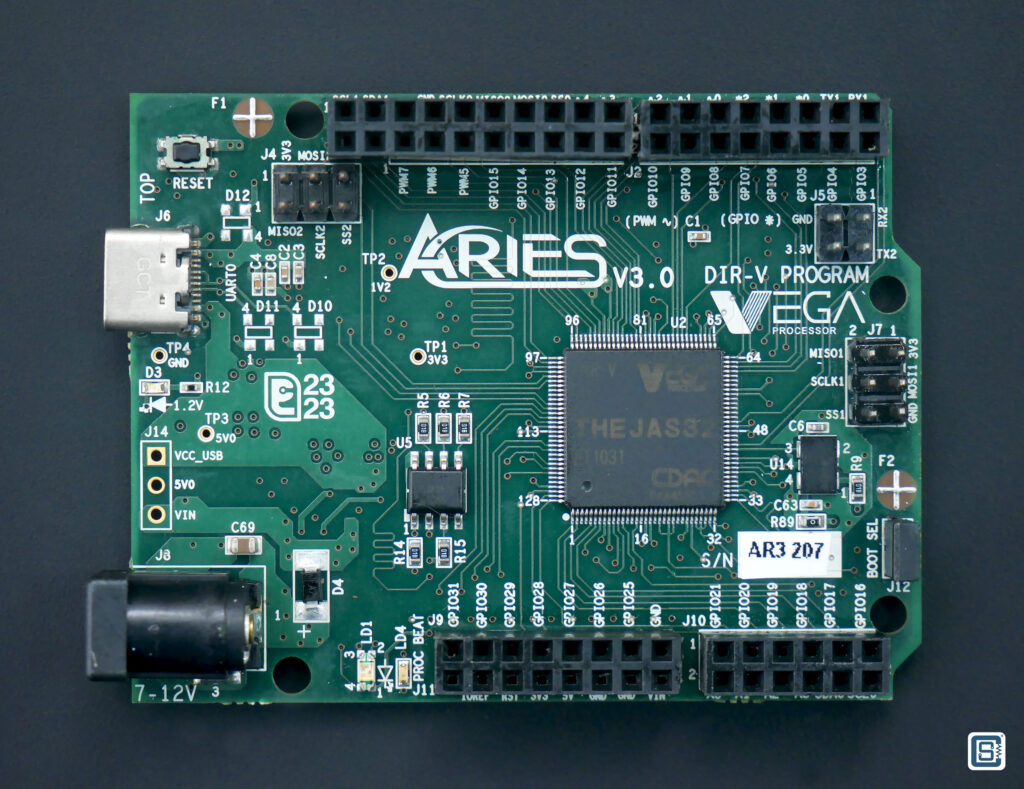
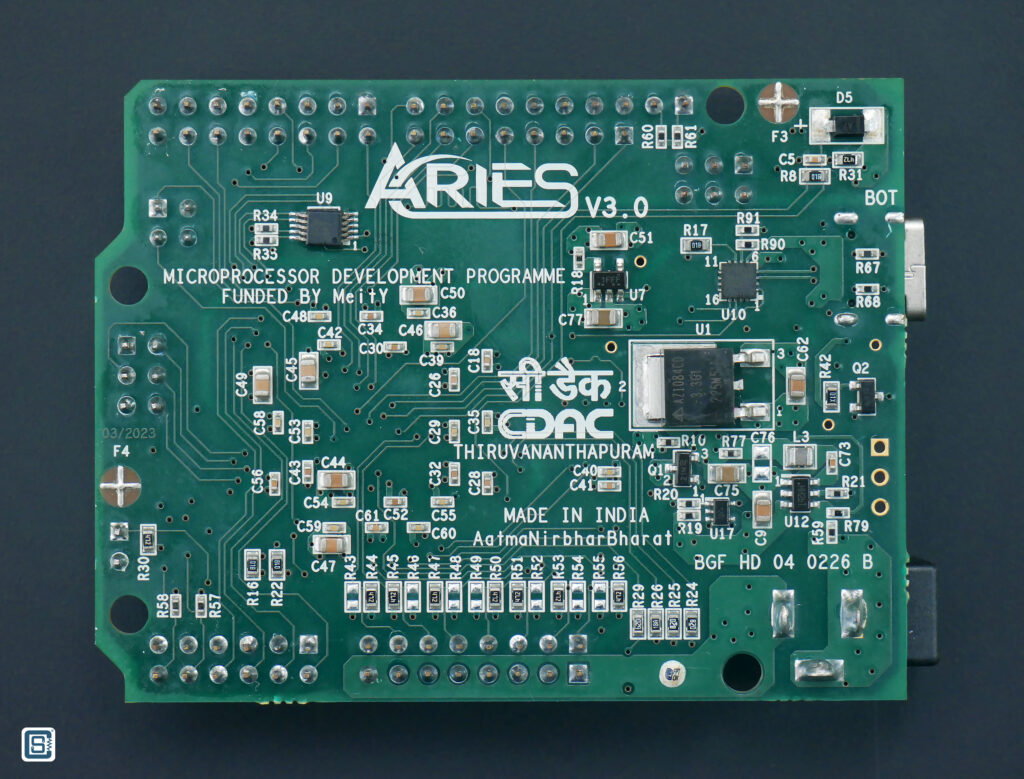
ARIES V3.0 is a microcontroller development platform based on the THEJAS32 SoC which operates at a frequency of 100MHz. THEJAS32 SoC includes a single VEGA ET1031 RISC-V microprocessor, 256 KB internal SRAM, three UARTs, four SPIs, three TIMERs, eight PWMs, three I2C interfaces, and 32 GPIOs among other things. There is no internal flash memory. An SPI flash memory has to be added externally. This board contains everything needed to support a standalone operation, including a 2 MB SPI flash memory. The board can be powered from a USB-C connector or with a DC voltage source between 7 to 12V. You can learn more about the board from our previous post.
Getting Started with C-DAC Aries V3 THEJAS32 Microcontroller Development Board
VEGA SDK
A Software Development Kit (SDK) is a set of software tools and files including a compiler toolchain, hardware definitions, peripheral libraries, example programs, and API documentation. The VEGA SDK is the official development framework for the VEGA series processors. The SDK is, at the moment, a private project hosted at GitLab and you need to get access to the repository to download the SDK. Fortunately, a user called rnayabed (Debayan Sutradhar) created a fork of the SDK and it is available on GitHub as project Taurus. We will be using the Taurus SDK here for building applications for the THEJAS32 microcontroller.
There is already a getting started tutorial from Debayan which you can find on the repository page. For this tutorial, we will use a computer running Windows 11 64-bit. If you are using a different operating system, the steps may be identical, but you will need to follow OS-specific variations of the same steps.
According to the author, the Taurus SDK differs from the official SDK in the following regards.
- Usage of CMake instead of GNU Make. This allows the usage of multiple build systems and compilation on Windows and Mac alongside Linux.
- Integration with vegadude uploader tool for seamless development experience.
- Cleaner code.
- Examples moved to a separate repository.
- setup.sh was completely rewritten with fine-tunable features. See setup script usage for more information.
- GPIO:
- All GPIO pins are intialised as OUTPUT LOW.
- Note: On Aries v2.0, Pins 26, 27, 29, and 30 are set to OUTPUT HIGH as these are inbuilt active-low LEDs.
- Removed led: Not needed as it is the same as GPIO.
- config.h
- Refactor, added SFRs.
- Timer
- Rewritten and simplified methods.
Prerequisites
We need to install the following software tools first. Since all of these tools are invoked from a terminal, it is best to have all of them available in the Path environment variable.
- CMake – Build Generator.
- RISC-V GNU Toolchain (Newlib) with support for
rv32im.- For Windows, you can use this prebuilt toolchain.
- For Linux, you can use this prebuilt toolchain or refer to your distribution’s repositories.
- Ninja Build System – This is the build system and it is required only for the Windows operating system. Linux systems do not require this.
- vegadude – A custom uploader tool for THEJAS32 SoC developed by Debayan. You can download this tool from the release page here. It lets you upload your program directly from cmake via
cmake --installwithout having to use a third-party terminal.
Installation
CMake
CMake is a build system generator. It does not actually build your projects but creates the build files necessary for a build system like Ninja to do the building. It is a cross-platform and open-source project. You can download and install the latest version of CMake on your system. At the time of writing this, the latest version is v3.28. Let’s download the Windows x64 MSI installer.
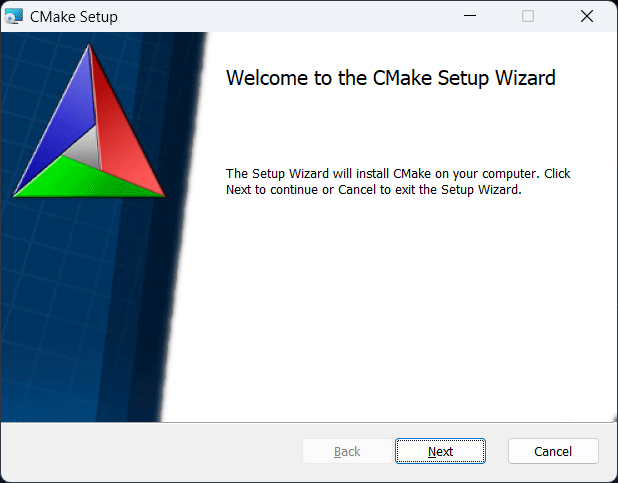
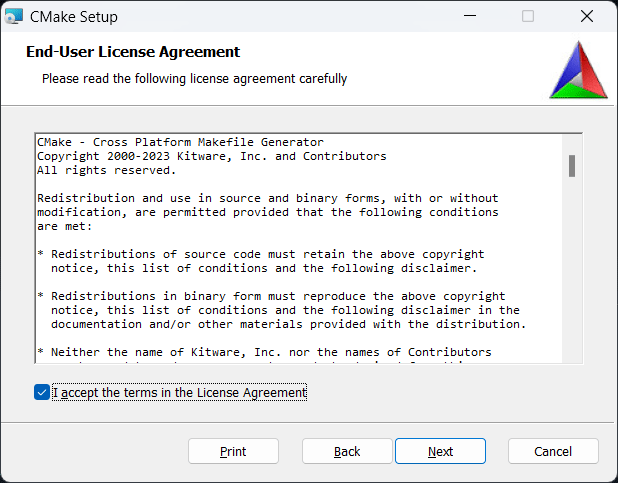
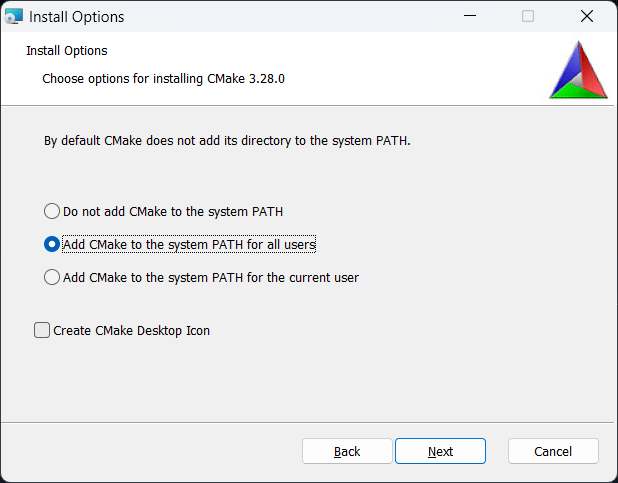
Allow CMake to add itself to the Windows Path variable, either for all the users or for a single user.
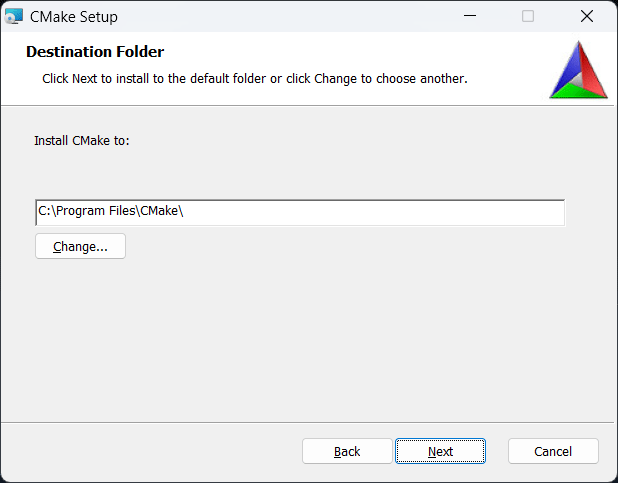
The default installation path of CMake is C:\Program Files\CMake\. You can keep it the same unless you want to change it.
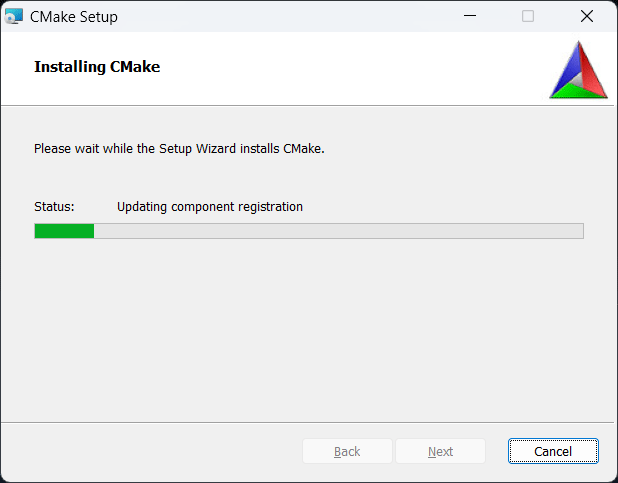
After installation, you can open the terminal application of your choice, here we are using Windows Terminal with PowerShell, and run the following command.
cmake --versionIf CMake was added to the Path, it should print the version information of the application. That confirms the installation was successful.
PS C:\Users\Vishnu Mohanan> cmake --version
cmake version 3.28.0-rc3

CMake suite maintained and supported by Kitware (kitware.com/cmake).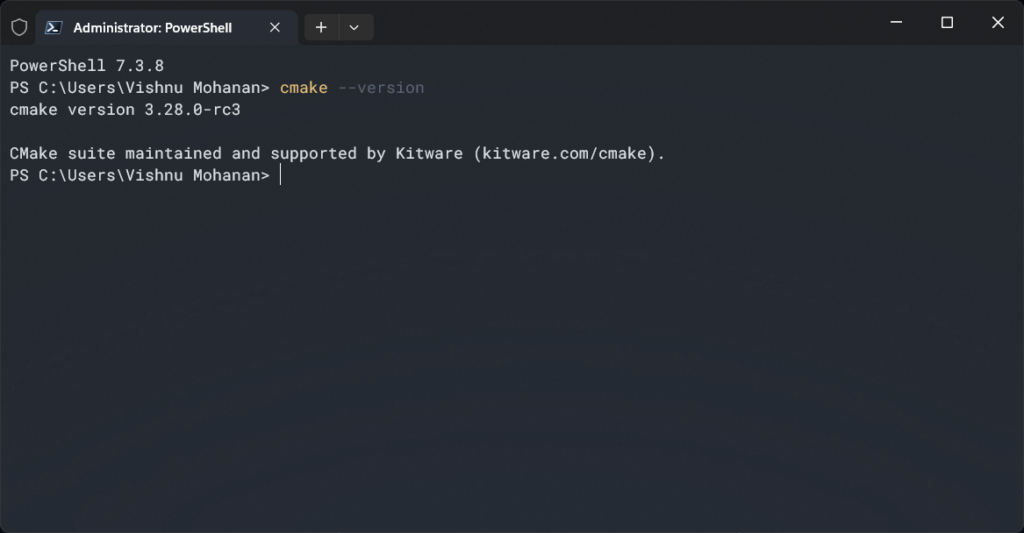
If the terminal says the command is not recognized, then there was an issue with the installation. Go to the installation folder and see if the files are installed correctly. Copy the path to the bin folder and add it to the Path environment variable; either for the current user or the entire system. In order to change the system variables, you will need to launch the application as administrator.
RISC-V GNU Toolchain
You can compile the toolchain from the sources if you want. Check out the official RISC-V GNU Toolchain from the RISC-V Foundation. But for this tutorial, we will use a prebuilt toolchain available for Windows from the VisualGDB website.
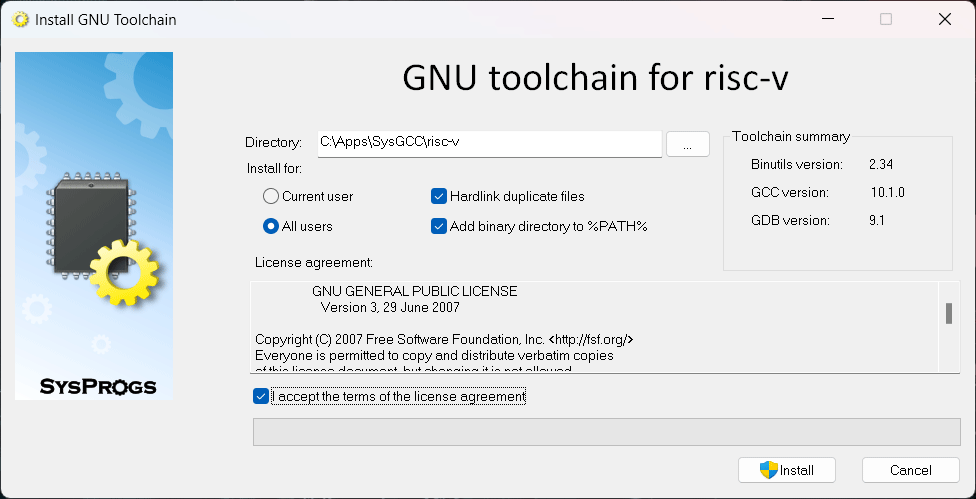
Just run the installer and configure the installation. We are installing the toolchain on a custom path and for all users. We will also add the toolchain to the Path environment variable.
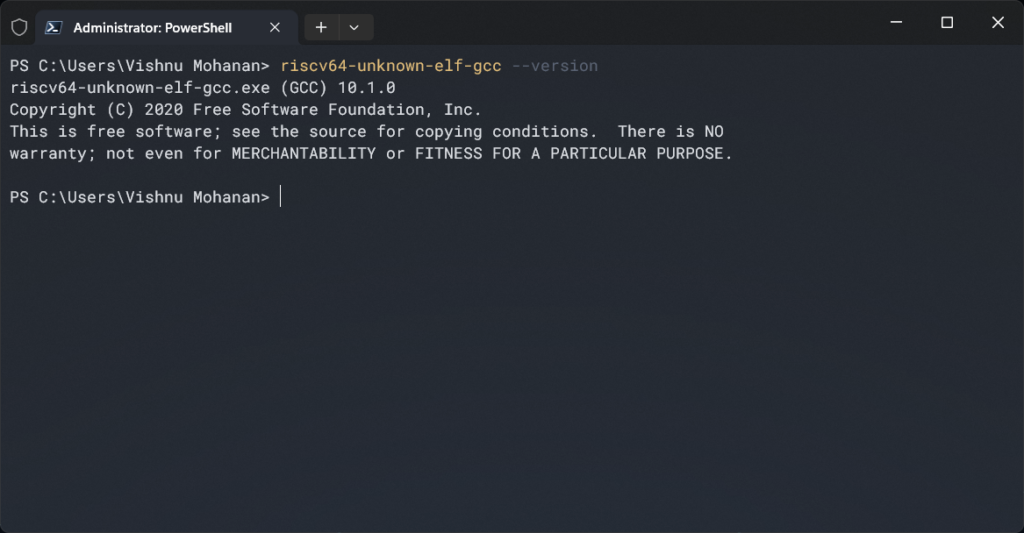
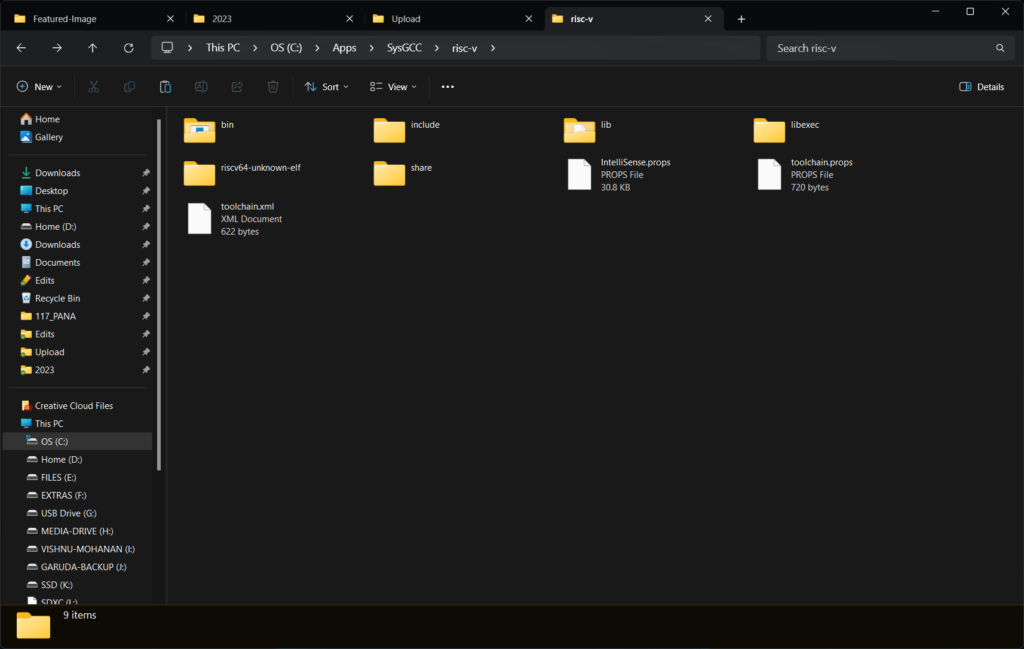
After the installation, you can check the installation folder for the files. The binary files will be inside the bin folder. This is the folder that gets added to the Path. To check if the executables are available on the Path, run the following command on the terminal.
riscv64-unknown-elf-gcc --versionIt should print the version information if the toolchain is installed correctly. If the terminal gives you a “command not recognized” error, try adding the bin folder to the Path manually.
Ninja
Ninja is a real build system. It can build the binary files for your projects, targeting different architectures. It is meant to be a faster alternative for the GNU Make. Ninja requires a higher-level build generator to generate the files necessary for it to work. This is an extra step, but it makes the compilation of large projects faster. CMake is the build generator we will use.
You can download the latest Ninja installer from the release page on GitHub. There is no installer for Ninja. You can move the single binary file Ninja.exe anywhere on your system and add it to the Path variable. We moved the file to a location inside the C: drive. To test if Ninja is available from command-line, run the following command. It should print the version information.
ninja --version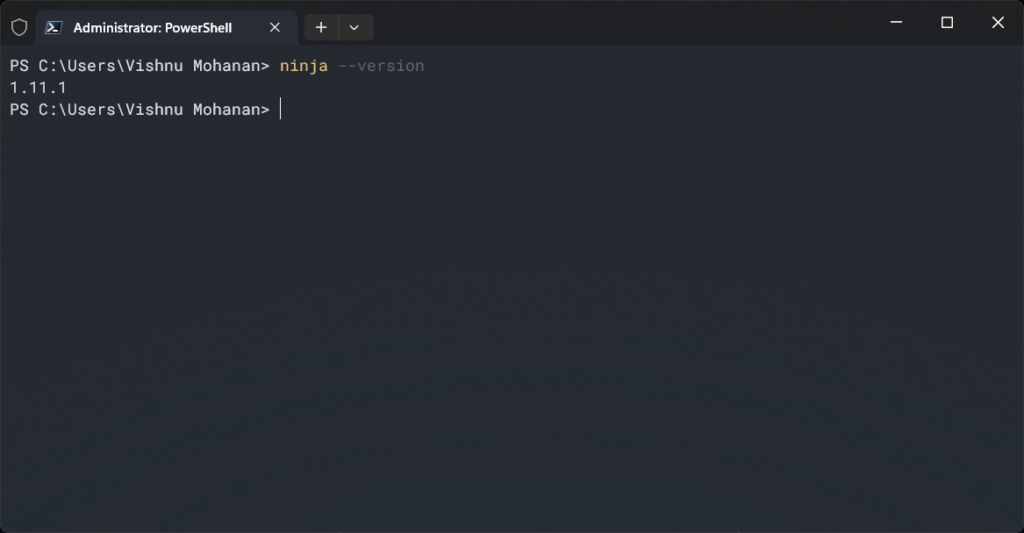
vegadude
vegadude is an uploader tool for uploading binary files to the VEGA series processors. The open-soruce project is developed by Debayan Sutradhar. To use this tool, you can either build it from the sources, or download the prebuilt binaries. To build, simply clone the repository to your system with the following command after cding into the source directory. Git should be already installed for this to work.
git clone https://github.com/rnayabed/vegadude.gitTo build the tool, run the following command after cding into the source directory. Since we already installed CMake, you don’t need to install anything else.
cmake -B build -S vegadude -DCMAKE_BUILD_TYPE=Release
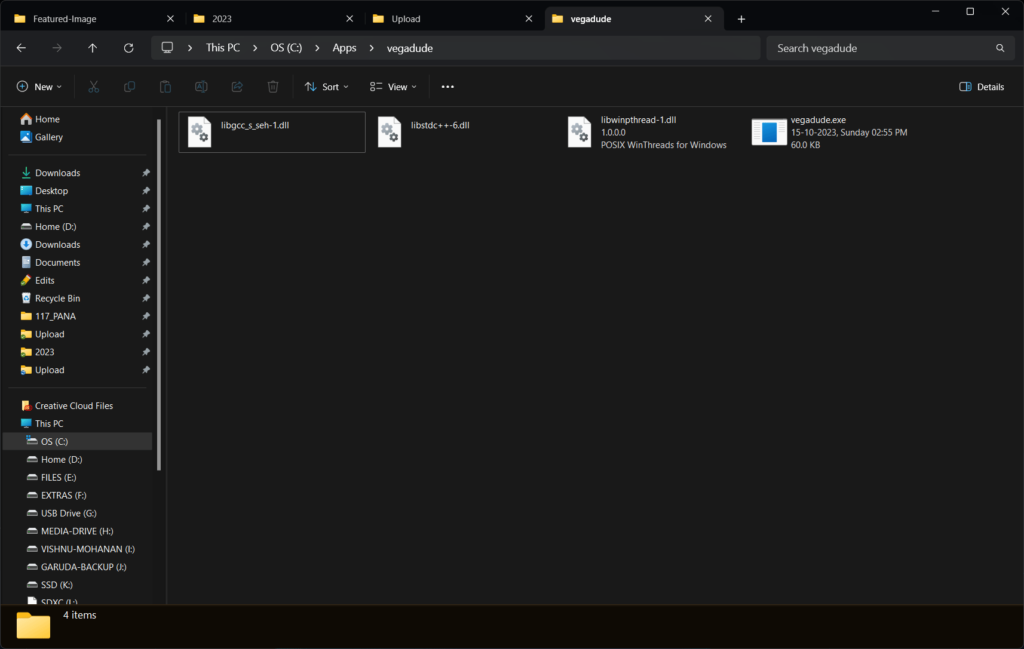
cmake --build buildIf you do not want to build vegadude by yourself, you can get the latest binaries from the release page. Extract the files somewhere on your system and add it to the Path variable.
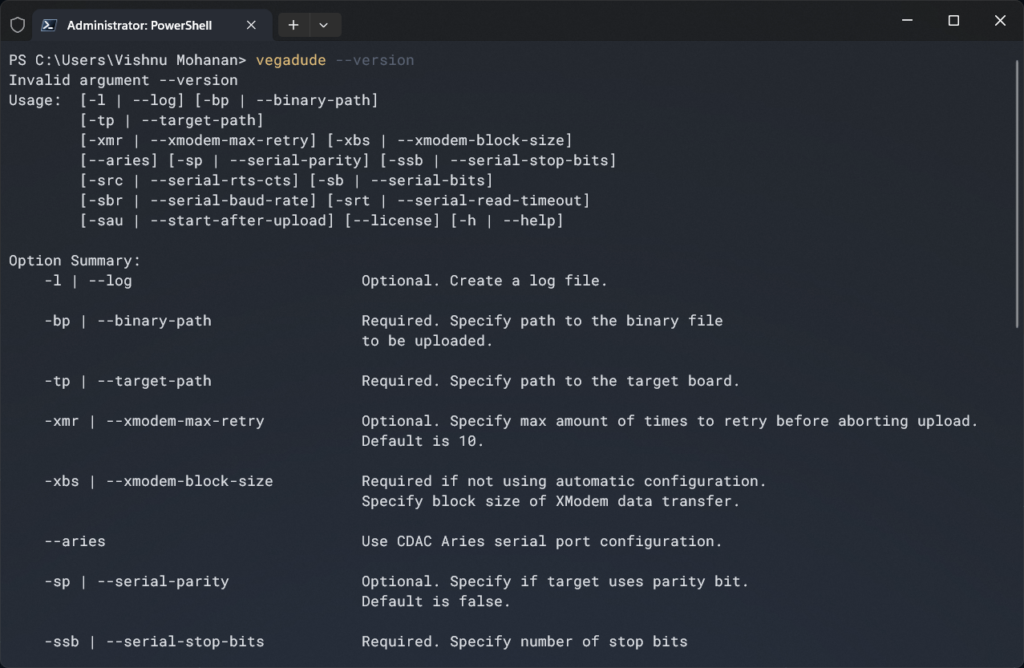
vegadude --versionvegadude is not the only tool you can use to upload firmware to your Aries V3 board. In fact, there are two official tools called vegaxmodem and vegaflasher, both are available from the C-DAC GitLab page. You can use any of these tools to flash your THEJAS32 microcontrollers.
Taurus VEGA SDK
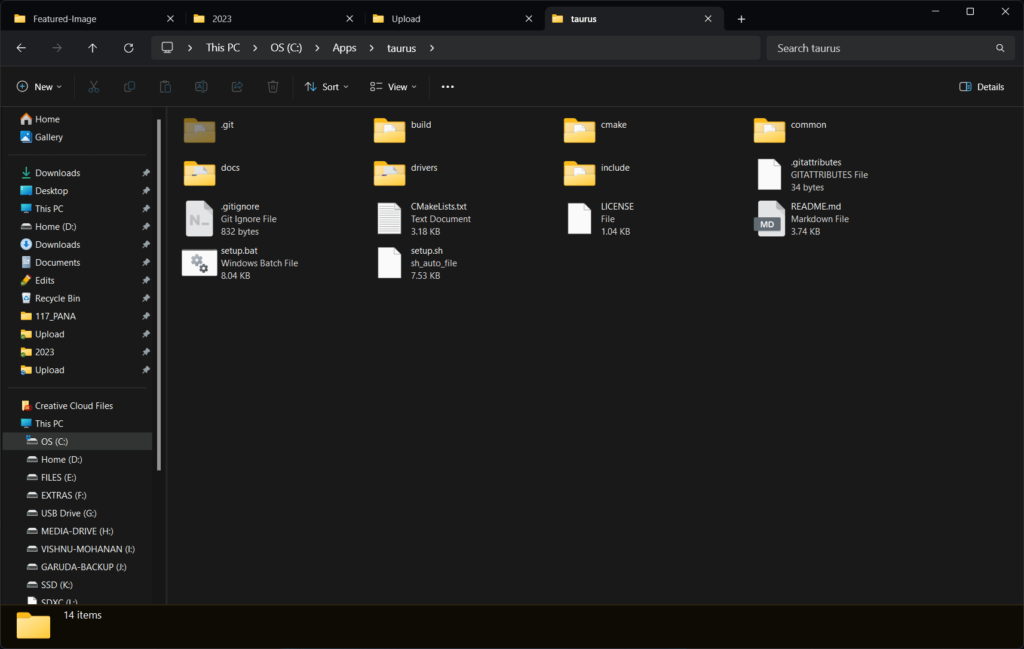
You can clone the Taurus SDK to your computer with the following command. You can cd into the folder you want to install and execute the command.
got clone https://github.com/rnayabed/taurus.gitWe saved the SDK to a location in the C: drive.
Building SDK Files
First, we need to build some of the static files of the SDK. These are usually peripheral libraries that we can compile and later link to our projects. There is a shell file (setup.sh) for Linux systems and a batch file (setup.bat) for Windows systems. We need to invoke this script with the required parameters to build the static libraries. The setup.bat file has the following contents.
:: SPDX-License-Identifier: MIT
:: Windows Setup Script
:: Authors : Debayan Sutradhar (@rnayabed)

@echo off

set "VERSION=0.1"

set "WEBSITE_URL=https://github.com/rnayabed/taurus.git"
set "LICENSE_URL=https://github.com/rnayabed/taurus/blob/master/LICENSE"
set "CHANGES_URL=https://github.com/rnayabed/taurus/blob/master/README.md#comparison-with-official-sdk"

set "SOURCE_PATH=%~dp0"
set "SOURCE_PATH=%SOURCE_PATH:\=/%"
set "BUILD_PATH=%SOURCE_PATH%/build"
set "BUILD_TYPE=Debug"
set "BUILD_SYSTEM=Ninja"

set "VALID_TARGET_BOARDS=ARIES_V2 ARIES_V3 ARIES_MICRO_V1 ARIES_IOT_V1"
set "VALID_TARGET_SOCS=THEJAS32 THEJAS64 CDACFPGA"

set "TAURUS_TARGET_BOARD="
set "TAURUS_TARGET_SOC="
set "TAURUS_TARGET_TRIPLET="
set "TAURUS_TOOLCHAIN_PATH="
set "TAURUS_INSTALL_PATH="
set "TAURUS_VEGADUDE_PATH="

for %%A in (%*) do (
    goto :parse_args
)

call :usage
exit /b 1


:parse_args

if "%~1"=="-tb"                     ( goto :set_target_board )
if "%~1"=="--target-board"          ( goto :set_target_board )

if "%~1"=="-ts"                     ( goto :set_target_soc )
if "%~1"=="--target-soc"            ( goto :set_target_soc )

if "%~1"=="-tt"                     ( goto :set_target_triplet )
if "%~1"=="--target-triplet"        ( goto :set_target_triplet )

if "%~1"=="-tp"                     ( goto :set_toolchain_path )
if "%~1"=="--toolchain-path"        ( goto :set_toolchain_path )

if "%~1"=="-ip"                     ( goto :set_install_path )
if "%~1"=="--install-path"          ( goto :set_install_path )

if "%~1"=="-vp"                     ( goto :set_vegadude_path )
if "%~1"=="--vegadude-path"         ( goto :set_vegadude_path )

if not "%~1"=="" (
    echo Invalid option %~1
    echo Run with --help for usage.
    exit /b 1
)

goto :validate_inputs

:parse_args_tail
shift
shift
goto :parse_args

:validate_inputs

set ERROR=0

set TARGET_ARGS=0
if not "%TAURUS_TARGET_BOARD%"==""  ( set /A TARGET_ARGS+=1 )
if not "%TAURUS_TARGET_SOC%"==""    ( set /A TARGET_ARGS+=1 )

if %TARGET_ARGS% equ 0 (
    echo Target board or target SoC required.
    set /A ERROR = 1
)
if %TARGET_ARGS% equ 2 (
    echo You cannot provide target board and target SoC at the same time.
    set /A ERROR = 1
)

if not "%TAURUS_TARGET_BOARD%"=="" (
    for %%A in (%VALID_TARGET_BOARDS%) do (
        if "%TAURUS_TARGET_BOARD%"=="%%A" ( goto :validate_inputs_tail )
    )
    echo Invalid target board provided.
    echo Valid target boards are %VALID_TARGET_BOARDS%
    set /A ERROR = 1
) else (
    for %%A in (%VALID_TARGET_SOCS%) do (
        if "%TAURUS_TARGET_SOC%"=="%%A" ( goto :validate_inputs_tail )
    )
    echo Invalid target SoC provided.
    echo Valid target SoCs are %VALID_TARGET_SOCS%
    set /A ERROR = 1
)

if "%TAURUS_TARGET_TRIPLET%"=="" (
    echo Target triplet required.
    set /A ERROR = 1
)

:validate_inputs_tail
if %ERROR% equ 1 (
    echo Run with --help for usage.
    exit /b 1
)


echo:
echo:
echo *****               *****
echo   ****             ****
echo     ****         ****
echo      *****     *****
echo        ************
echo       **************
echo      ***         ***
echo     ***           ***
echo     ***           ***
echo      ***         ***
echo       *****   *****
echo         *********
echo:
echo     Taurus SDK - %VERSION%
echo:
echo:
echo Website
echo %WEBSITE_URL%
echo:
echo To know full list of changes compared to the original SDK,
echo please visit
echo %CHANGES_URL%
echo:
echo This program comes with ABSOLUTELY NO WARRANTY.
echo This is free software, and you are welcome to redistribute it
echo under certain conditions.
echo:
echo Full license can be found in the 'LICENSE' file provided with the SDK.
echo The license can also be viewed by visiting %LICENSE_URL%
echo:

set "com=cmake -B "%BUILD_PATH%" -S "%SOURCE_PATH%" -G "%BUILD_SYSTEM%" -DCMAKE_BUILD_TYPE=%BUILD_TYPE% -DTAURUS_TARGET_TRIPLET=%TAURUS_TARGET_TRIPLET% "

if not "%TAURUS_TARGET_BOARD%"=="" (
    set "com=%com%-DTAURUS_TARGET_BOARD=%TAURUS_TARGET_BOARD% "
    set "TAURUS_TARGET=%TAURUS_TARGET_BOARD%"
) else (
    set "com=%com%-DTAURUS_TARGET_SOC=%TAURUS_TARGET_SOC% "
    set "TAURUS_TARGET=%TAURUS_TARGET_SOC%"
)

if not "%TAURUS_TOOLCHAIN_PATH%"=="" (
    set "com=%com%-DTAURUS_TOOLCHAIN_PATH="%TAURUS_TOOLCHAIN_PATH%" "
)

if not "%TAURUS_INSTALL_PATH%"=="" (
    set "com=%com%-DCMAKE_INSTALL_PREFIX="%TAURUS_INSTALL_PATH%" "
)

if not "%TAURUS_VEGADUDE_PATH%"=="" (
    set "com=%com%-DTAURUS_VEGADUDE_PATH="%TAURUS_VEGADUDE_PATH%" "
)

echo:
echo Removing old files ...

rmdir /S /Q "%BUILD_PATH%"

echo:
echo Generating build system ...

%com% || goto :failed_to_generate_build_system

echo:
echo Compiling ...

cmake --build "%BUILD_PATH%" || goto :failed_to_compile

echo:
echo Installing ...

cmake --install "%BUILD_PATH%" || goto :failed_to_install

echo:
echo =====================================================================
echo Taurus SDK %VERSION% for %TAURUS_TARGET% is now ready to use.
echo:
echo For queries, issues, etc. visit
echo %WEBSITE_URL%
echo:
echo Enjoy!
echo =====================================================================

exit /b 0


:failed_to_generate_build_system
echo:
echo Failed to generate build system for Taurus SDK.
exit /b 1

:failed_to_compile
echo:
echo Failed to compile Taurus SDK.
exit /b 1

:failed_to_install
echo:
echo Failed to install Taurus SDK. Check if you have required rights.
echo Rerun script with administrator rights if you are installing in a sensitive directory.
exit /b 1

:usage
echo Usage:  ^[-tb ^| --target-board ^] ^[-ts ^| --target-soc^]
echo         ^[-tt ^| --target-triplet^] ^[-tp ^| --toolchain-path^]
echo         ^[-ip ^| --install-path^] ^[-vp ^| --vegadude-path^]
echo         ^[-h ^| --help^]
echo:
echo Option Summary:
echo    -tb ^| --target-board                Required if --target-soc not provided.
echo                                        Set the target development board to
echo                                        build Taurus for. Adds extra optimisations
echo                                        for board if available.
echo                                        Valid targets are:
echo                                        %s
echo:
echo    -ts ^| --target-soc                  Required if --target-board not provided.
echo                                        Set the target System-on-Chip to build
echo                                        Taurus for.
echo                                        Valid targets are:
echo                                        %s
echo:
echo    -tt ^| --target-triplet              Required. RISC-V GNU Compiler Target
echo                                        triplet.
echo                                        Example: 'riscv64-unknown-elf'
echo:
echo    -tp ^| --toolchain-path              Optional. Specify the absolute path of
echo                                        toolchain if it is not present in PATH.
echo:
echo    -ip ^| --install-path                Optional. Path where Taurus will be
echo                                        installed.
echo:
echo    -vp ^| --vegadude-path               Optional. Provide vegadude path for taurus integration.
echo                                        Not required if vegadude is already present in PATH.
echo:
echo    -h  --help                          Print this message.
echo:
exit /b 0

:set_target_board
set "TAURUS_TARGET_BOARD=%~2"
goto :parse_args_tail

:set_target_soc
set "TAURUS_TARGET_SOC=%~2"
goto :parse_args_tail

:set_target_triplet
set "TAURUS_TARGET_TRIPLET=%~2"
goto :parse_args_tail

:set_toolchain_path
set "TAURUS_TOOLCHAIN_PATH=%~2"
set "TAURUS_TOOLCHAIN_PATH=%TAURUS_TOOLCHAIN_PATH:\=/%"
goto :parse_args_tail

:set_install_path
set "TAURUS_INSTALL_PATH=%~2"
set "TAURUS_INSTALL_PATH=%TAURUS_INSTALL_PATH:\=/%"
goto :parse_args_tail

:set_vegadude_path
set "TAURUS_VEGADUDE_PATH=%~2"
set "TAURUS_VEGADUDE_PATH=%TAURUS_VEGADUDE_PATH:\=/%"
goto :parse_args_tail
Now you can cd into the SDK installation directory from a terminal window. In Windows, we can right-click inside a directory in File Explorer and open a new terminal there. In the terminal, execute the following command.
./setup.batThis will print the usage of the script.
Usage:  [-tb | --target-board] [-ts | --target-soc]
        [-tt | --toolchain-triplet] [-tp | --toolchain-path]
        [-ip | --install-path] [-vp | --vegadude-path]
        [-nm | --no-minicom]
        [-h | --help]

Option Summary:
    -tb | --target-board                Required if --target-soc not provided.
                                        Set the target development board to
                                        build Taurus for. Adds extra optimisations
                                        for board if available.
                                        Valid targets are:
                                        ARIES_V2 ARIES_V3 ARIES_MICRO_V1 ARIES_IOT_V1

    -ts | --target-soc                  Required if --target-board not provided.
                                        Set the target System-on-Chip to build
                                        Taurus for.
                                        Valid targets are:
                                        THEJAS32 THEJAS64 CDACFPGA

    -tt | --toolchain-triplet           Required. RISC-V GNU Compiler Toolchain
                                        triplet.
                                        Example: 'riscv64-unknown-elf'

    -tp | --toolchain-path              Optional. Specify the absolute path of
                                        toolchain if it is not present in PATH.

    -ip | --install-path                Optional. Path where Taurus will be
                                        installed.

    -vp | --vegadude-path               Optional. Provide vegadude path for taurus integration.
                                        Not required if vegadude is already present in PATH.

    -nm | --no-minicom                  Optional. Do not create minicom
                                        configuration file. Configuration is
                                        created if not specified.

-h --help Print this message.Since we are using the Aries V3 board and the RISC-V toolchain we downloaded earlier, we can run the following command to build the static files and install the SDK files required for the specified target (here, THEJAS32).
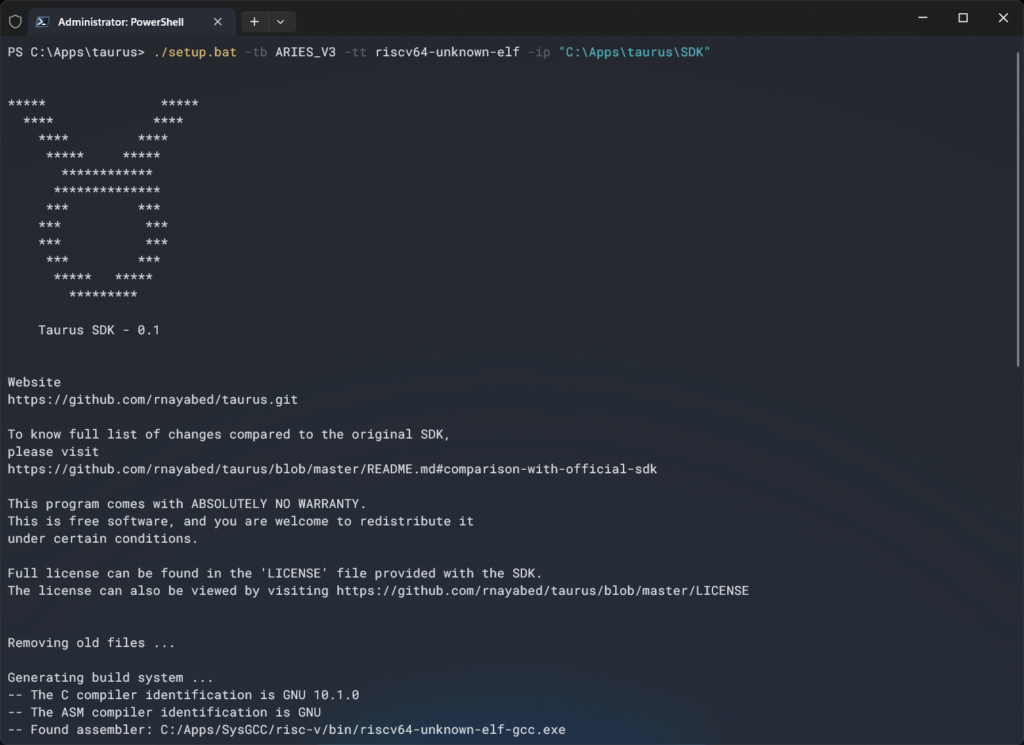
./setup.bat -tb ARIES_V3 -tt riscv64-unknown-elf -ip "C:\Apps\taurus\SDK"We are installing SDK-related files to the C:\Apps\taurus\SDK location using the -ip argument. If you don’t specify where to save the files, they will be saved to C:\Program Files (x86)\taurus by default. Run the command and it will print the following log to the terminal. The CMake build files are written to C:/Apps/taurus/build where the cloned project resides.
PS C:\Apps\taurus> ./setup.bat -tb ARIES_V3 -tt riscv64-unknown-elf -ip "C:\Apps\taurus\SDK"


*****               *****
  ****             ****
    ****         ****
     *****     *****
       ************
      **************
     ***         ***
    ***           ***
    ***           ***
     ***         ***
      *****   *****
        *********

    Taurus SDK - 0.1


Website
https://github.com/rnayabed/taurus.git

To know full list of changes compared to the original SDK,
please visit
https://github.com/rnayabed/taurus/blob/master/README.md#comparison-with-official-sdk

This program comes with ABSOLUTELY NO WARRANTY.
This is free software, and you are welcome to redistribute it
under certain conditions.

Full license can be found in the 'LICENSE' file provided with the SDK.
The license can also be viewed by visiting https://github.com/rnayabed/taurus/blob/master/LICENSE


Removing old files ...

Generating build system ...
-- The C compiler identification is GNU 10.1.0
-- The ASM compiler identification is GNU
-- Found assembler: C:/Apps/SysGCC/risc-v/bin/riscv64-unknown-elf-gcc.exe
-- Detecting C compiler ABI info
-- Detecting C compiler ABI info - done
-- Check for working C compiler: C:/Apps/SysGCC/risc-v/bin/riscv64-unknown-elf-gcc.exe - skipped
-- Detecting C compile features
-- Detecting C compile features - done
-- Configuring done (1.8s)
-- Generating done (0.0s)
-- Build files have been written to: C:/Apps/taurus/build

Compiling ...
[13/13] Linking C static library libtaurus.a

Installing ...
-- Install configuration: "Debug"
-- Installing: C:/Apps/taurus/SDK/lib/libtaurus.a
-- Installing: C:/Apps/taurus/SDK/include/taurus/gpio.h
-- Installing: C:/Apps/taurus/SDK/include/taurus/i2c.h
-- Installing: C:/Apps/taurus/SDK/include/taurus/qspi.h
-- Installing: C:/Apps/taurus/SDK/include/taurus/m25p80_eeprom.h
-- Installing: C:/Apps/taurus/SDK/include/taurus/config.h
-- Installing: C:/Apps/taurus/SDK/include/taurus/spi.h
-- Installing: C:/Apps/taurus/SDK/include/taurus/timer.h
-- Installing: C:/Apps/taurus/SDK/include/taurus/uart.h
-- Installing: C:/Apps/taurus/SDK/include/taurus/debug_uart.h
-- Installing: C:/Apps/taurus/SDK/include/taurus/adc.h
-- Installing: C:/Apps/taurus/SDK/include/taurus/interrupt.h
-- Installing: C:/Apps/taurus/SDK/include/taurus/pwmc.h
-- Installing: C:/Apps/taurus/SDK/include/taurus/encoding.h
-- Installing: C:/Apps/taurus/SDK/include/taurus/stdlib.h
-- Installing: C:/Apps/taurus/SDK/lib/cmake/taurus/taurusTargets.cmake
-- Installing: C:/Apps/taurus/SDK/lib/cmake/taurus/taurusTargets-debug.cmake
-- Installing: C:/Apps/taurus/SDK/lib/cmake/taurus/taurusConfig.cmake
-- Installing: C:/Apps/taurus/SDK/lib/cmake/taurus/taurusConfigVersion.cmake
-- Installing: C:/Apps/taurus/SDK/lib/cmake/taurus/taurusToolchain.cmake
-- Installing: C:/Apps/taurus/SDK/lib/cmake/taurus/taurusUploader.cmake.in

=====================================================================
Taurus SDK 0.1 for ARIES_V3 is now ready to use.

For queries, issues, etc. visit
https://github.com/rnayabed/taurus.git

Enjoy!
=====================================================================
Creating A Project
Instructions for creating and building C/C++ projects for the Taurus SDK are documented on this page by the author. You can create a Taurus SDK project anywhere on your system. You will need two files:
- A C/C++ source file with the main function.
- A CMakeLists.txt file.
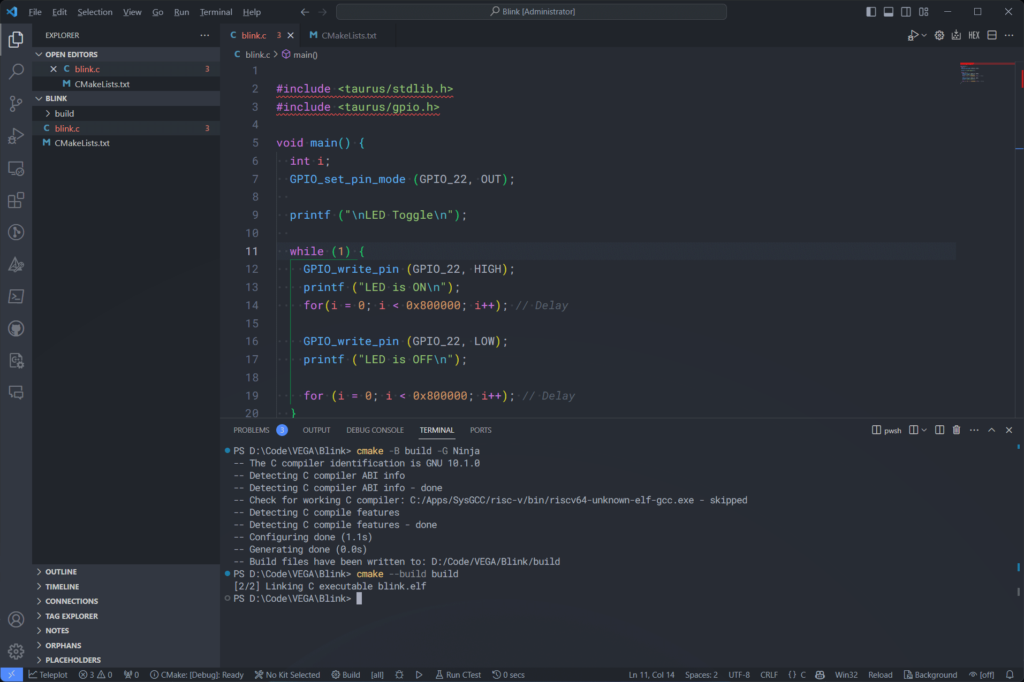
We will create a project to blink an LED connected to GPIO22 of the Aries V3 board. We will use Visual Studio Code as our editor. The main source file is called blink.c and it has the following contents.
#include <taurus/stdlib.h>
#include <taurus/gpio.h>

void main() {
  int i;
  GPIO_set_pin_mode (GPIO_22, OUT);
  GPIO_set_pin_mode (GPIO_23, OUT);
  GPIO_set_pin_mode (GPIO_24, OUT);

  GPIO_write_pin (GPIO_23, HIGH);
  GPIO_write_pin (GPIO_24, HIGH);

  printf ("\nLED Toggle\n");

  while (1) {
    GPIO_write_pin (GPIO_22, HIGH);
    printf ("LED is ON\n");
    for(i = 0; i < 0x800000; i++); // Delay

    GPIO_write_pin (GPIO_22, LOW);
    printf ("LED is OFF\n");

    for (i = 0; i < 0x800000; i++); // Delay
  }
}In the first two lines, we include the standard library and the GPIO library. In the main() function, we can create a variable i for iterating the loops and setting the GPIO_22, GPIO_23, and GPIO_24 to output. These three pins are connected to the RGB LED (LD1) on the Aries V3 board and are turned on with a LOW signal. We will only blink the green LED connected to GPIO 22. So lines 10 and 11 set the remaining two LEDs to off.
Followed by that is a while loop that will run indefinitely and toggle the state of the GPIO_22 between HIGH and LOW. We will also print a message to the standard output which is UART0. You can also see that we are not initializing the serial output port explicitly as this is already in the startup code. The delay is generated with the help of for loops that simply count to a large number.
We need a CMake configuration file for compiling our C/C++ source file. We will create a CMakeLists.txt file with the following contents.
cmake_minimum_required (VERSION 3.16)

list (APPEND CMAKE_PREFIX_PATH "C:/Apps/taurus/SDK")

find_package (taurus 0.1 REQUIRED)

project (blink.elf LANGUAGES C)

add_executable (${PROJECT_NAME} blink.c)

target_link_libraries (${PROJECT_NAME} PRIVATE taurus::taurus)

configure_taurus_uploader (
  START_AFTER_UPLOAD
  TARGET_PATH COM33
)In the file, we are specifying where the SDK is located, the type of output file we need (blink.elf), the main source file (blink.c), and two custom parameters for the vegadude.
Building The Project
After saving the files, you can open the terminal in VS Code and run the following command.
cmake -B build -G NinjaThis will generate the build system files for the Ninja build system and save them to the build directory in the project root. We got the following log in the terminal.
PS D:\Code\VEGA\Blink> cmake -B build -G Ninja
-- The C compiler identification is GNU 10.1.0
-- Detecting C compiler ABI info
-- Detecting C compiler ABI info - done
-- Check for working C compiler: C:/Apps/SysGCC/risc-v/bin/riscv64-unknown-elf-gcc.exe - skipped
-- Detecting C compile features
-- Detecting C compile features - done
-- Configuring done (1.1s)
-- Generating done (0.0s)Next, we can build our project. Run the following command for that.
cmake --build buildWe are asking CMake to run Ninja and build the project files. It produces the following output as expected.
PS D:\Code\VEGA\Blink> cmake --build build
[2/2] Linking C executable blink.elfA new file called blink.elf file will be written to the build directory. This is our firmware that we can upload to our Aries V3 board. That’s all there to it for building a C/C++ project for your Aries V3 board or any THEJAS32 board. All you need to do now is to upload the ELF file to the flash memory of the board.
Using VS Code & CMake Extension
We can automate all of the steps required to build the project using VS Code and the CMake extension available for it. Install the following extensions to get started.
You can also install the C/C++ Extension Pack which will install all of the listed tools together. We also recommend installing the following extensions, though not necessary for this tutorial.
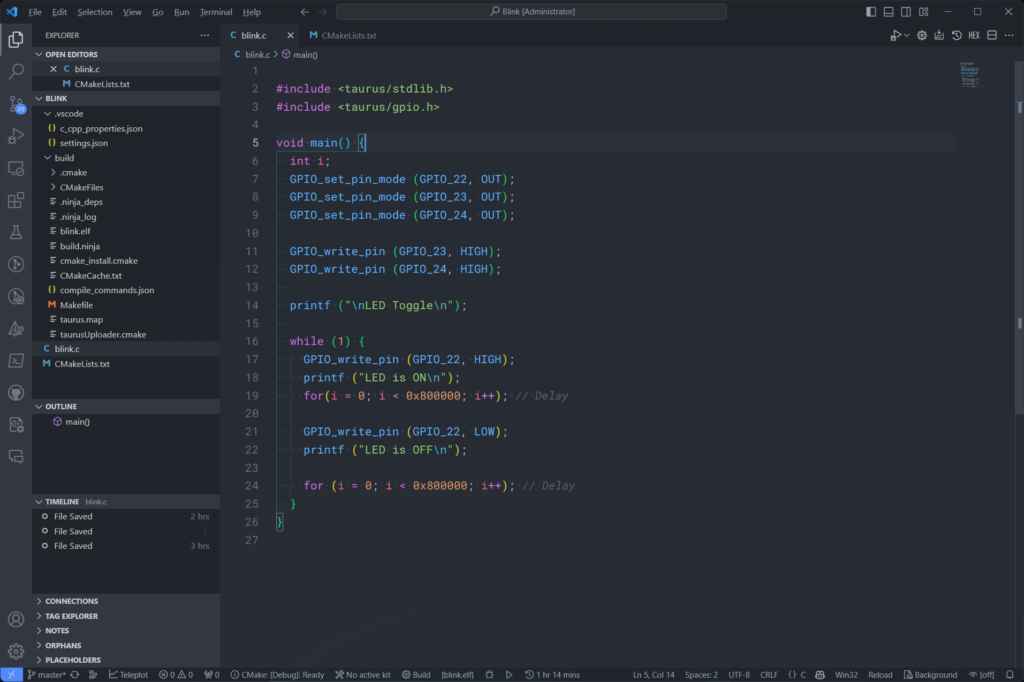
After installing, reload the project directory. The bottom panel of VS Code will now show a few CMake-related buttons. These include,
- CMake (Debug): Ready – Indicates the type of build mode for CMake. This can be Release, Debug, etc. Leave it for the default setting in the CMake configuration (Debug).
- No Active Kit – The type of toolchain selected. Leave it to use the default toolchain specified in the CMake configuration. Or keep it [Unspecified] to let CMake decide the toolchain kit.
- Build – Button for starting the build process. This will build all the targets currently selected.
- [all] – The targets to build. [all] means, all targets specified in the CMake configuration. You can also select a specific target, for example, blink.elf [EXECUTABLE].
- Win32 – Indicates the type of IntelliSense mode active. You can leave it as is.
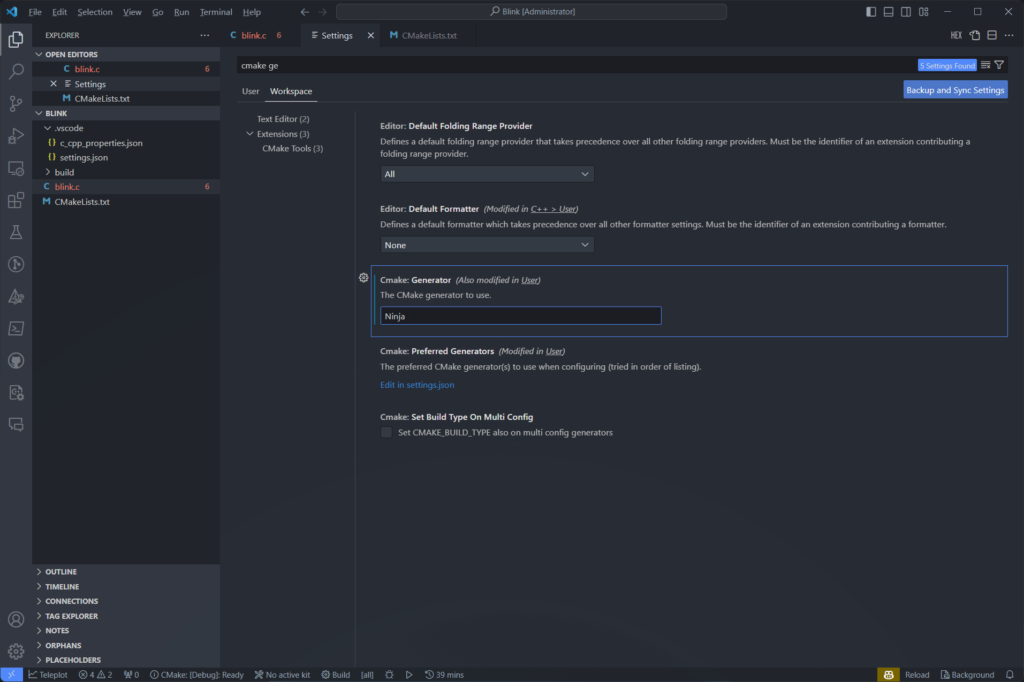
Before you can build the project, we need to specify the type of build system we are using, to the CMake extension. This can be set from settings. Open the VS Code settings and search for “cmake generator”. You can change the value of Cmake: Generator for the user or just for the workspace. We will change this for the workspace only. Change the value to Ninja and close the settings, which will automatically save the new setting.
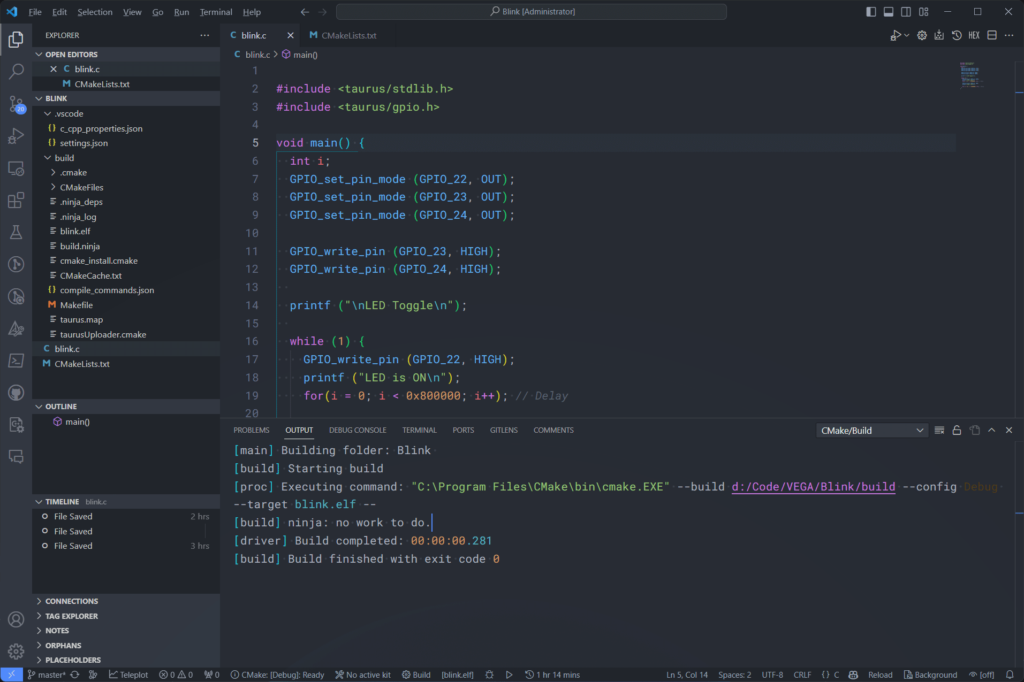
After that, click on the Build button to build your project. This will open the OUTPUT window where you can see the build log. If the build is successful, the process will exit with code 0. If you get any other codes, there is an error. In that case, go back to the previous steps of this tutorial and make sure you have followed every step correctly and you got the expected outputs.
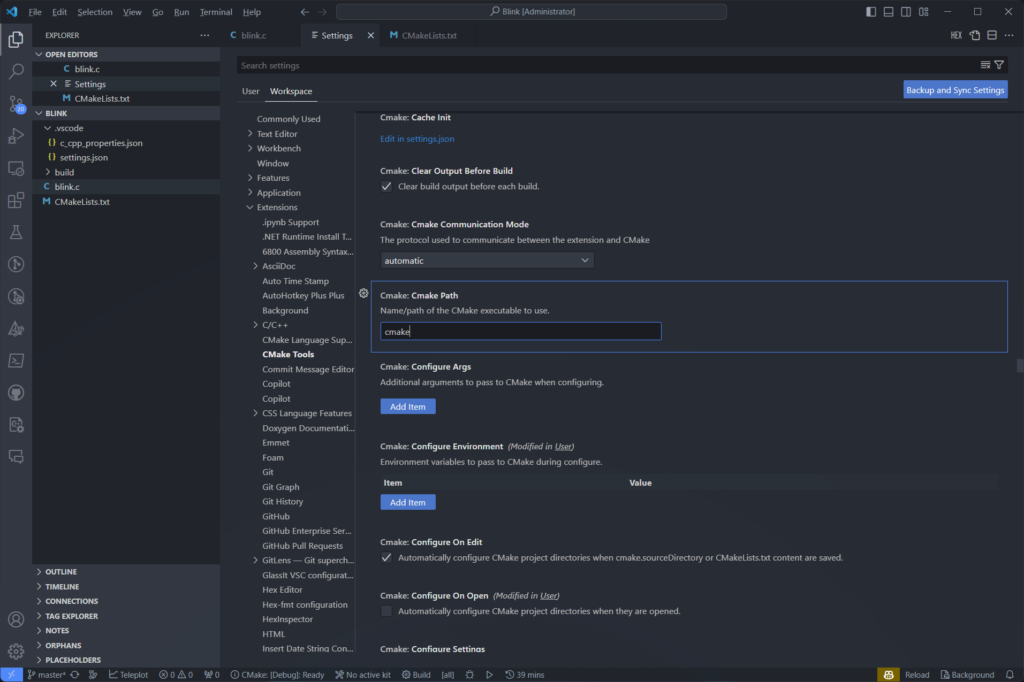
If the extension is not able to find CMake (the CMake application and the CMake extension are different things) in your system, you can again go to the VS Code settings and search for “cmake path”. Then set the Cmake: Path to cmake, if you already have CMake available on your Path variable. Otherwise, put the full path of the CMake bin directory here.
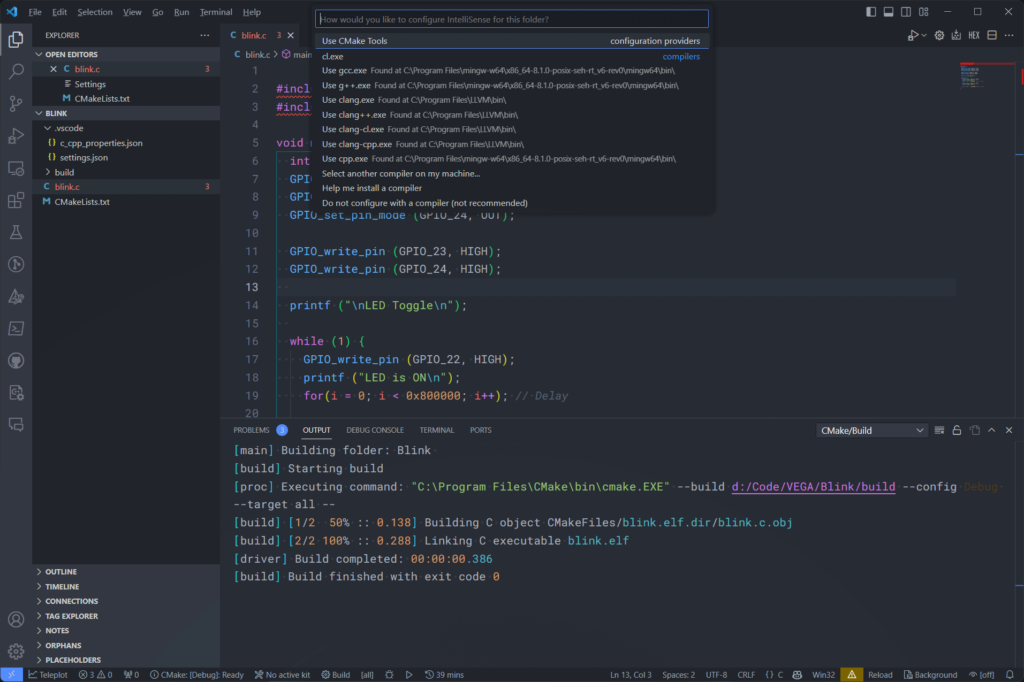
The next step is to configure the IntelliSense. When you first build the project, and if it is successful, you will get a warning from the C/C++ IntelliSense that shows an exclamation mark on the bottom panel. Click on it and choose “Use CMake Tools” from the list. This will allow IntelliSense to fetch all dependency data from the CMake configuration. After that, the red squiggly lines will disappear and you will get full IntelliSense when you type code.
Uploading
Uploading, also called flashing, is the process of transferring a binary file to the memory of a microcontroller system. The binary file can be in .bin, .hex. or .elf formats. In this case, the format is ELF. For THEJAS32, we can use the following tools to upload the firmware.
- vegadude
- vegaxmodem
- vegaflasher
vegadude
vegadude is written by Debayan Sutradhar and it works on both Linux, Mac, and Windows. vegadude can be integrated with the CMake configuration file as we saw earlier. You can add the COM port in the project CMake configuration. In this case, the COM port is COM33. Run the following command from the terminal after building the project.
cmake --install buildAnd it fails with the following output.
PS D:\Code\VEGA\Blink> cmake --install build
-- Install configuration: ""
vegadude 1.0
<https://github.com/rnayabed/vegadude>

================================================
Device Path: "COM33"
Binary Path: "D:/Code/VEGA/Blink/build/blink.elf"
Target device properties:
Parity: 0
Stop bits: 1
RTS CTS: 0
Bits: 8
Baud rate: 115200
Read Timeout (in milliseconds): 500
XMODEM Block Size 128
XMODEM Max Retry: 10
================================================

Failed to setup serial device!
Failed to open device
CMake Error at build/taurusUploader.cmake:49 (execute_process):
  execute_process failed command indexes:

    1: "Child return code: 4294967295"

Call Stack (most recent call first):
  build/cmake_install.cmake:41 (include)
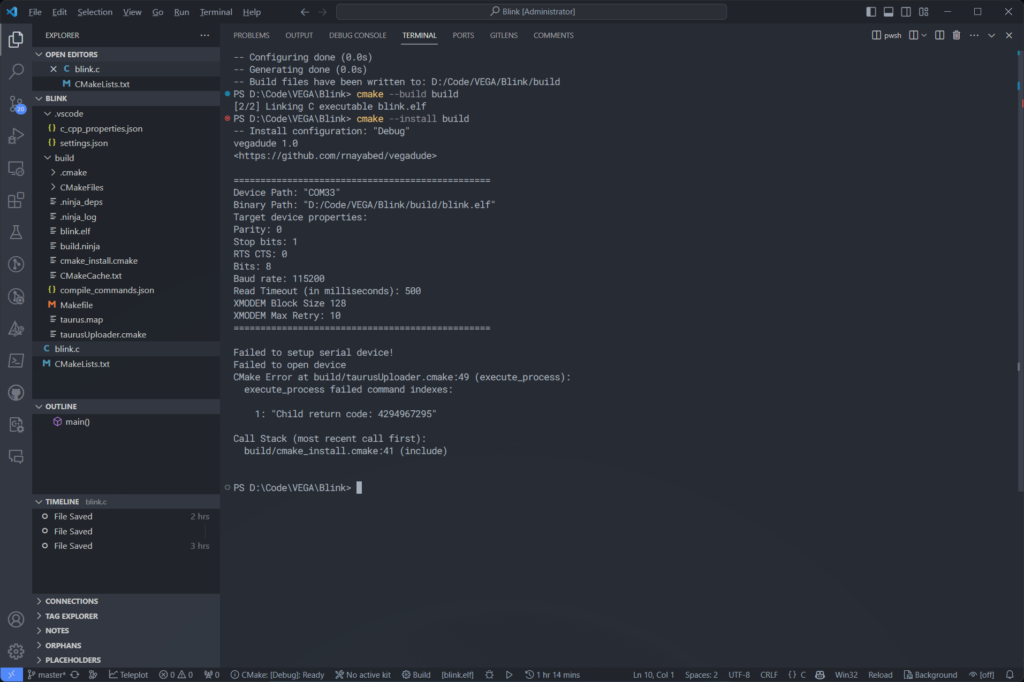
Looks like it failed to open the serial port for some reason, even though the serial port was a valid one and it is not being used by any other apps. Let’s try directly calling vegadude from the terminal with the following command.
vegadude -tp COM33 -bp "\build\blink.elf" --aries -sauThat also fails with the same error as you can see from the log below.
PS D:\Code\VEGA\Blink> vegadude -tp COM33 -bp "\build\blink.elf" --aries -sau
vegadude 1.0
<https://github.com/rnayabed/vegadude>

================================================
Device Path: "COM33"
Binary Path: "\\build\\blink.elf"
Target device properties:
Parity: 0
Stop bits: 1
RTS CTS: 0
Bits: 8
Baud rate: 115200
Read Timeout (in milliseconds): 500
XMODEM Block Size 128
XMODEM Max Retry: 10
================================================

Failed to setup serial device!
Failed to open deviceSo something is wrong with vegadude. Or we are doing something wrong. Anyway, let’s not worry yet. Because we still have two more tools to upload the code.
vegaxmodem
vegaxmodem is a tool from C-DAC for flashing VEGA SoCs when the CPU is booted from an external flash memory. The boot mode and the flashing mode are determined by the state of the 2-pin jumper J12 (BOOT SEL).
- If the BOOT SEL jumper is shorted, the CPU boots from external SPI flash memory. Use vegaflasher for uploading.
- If BOOT SEL is not shorted, the CPU boots from the UART interface. Use vegaxmodem for uploading.
So to use vegaxmodem, J12 must be open. vegaxmodem is available for both Linux and Windows. You can download the Windows version from here. We will save the files to the location C:\Apps\ in our system. You can also clone the project to your computer. Now open a terminal from that folder and run the following command. Make sure the J12 jumper on your board is open. Otherwise, this operation will fail.
./xmodem.bat COM33 "D:/Code/VEGA/Blink/build/blink.elf"Simply replace the COM port with the COM port on your system and the executable path with your own path. This will upload the firmware to the board, and once completed, the green LED will start to blink. The uploading process can take around 25 seconds to complete. Following is the upload log. Wait until the message "Uploading Completed!" is printed.
PS C:\Apps\vega-xmodem-windows-main> ./xmodem.bat COM33 "D:/Code/VEGA/Blink/build/blink.elf"
Done
Uploading Completed!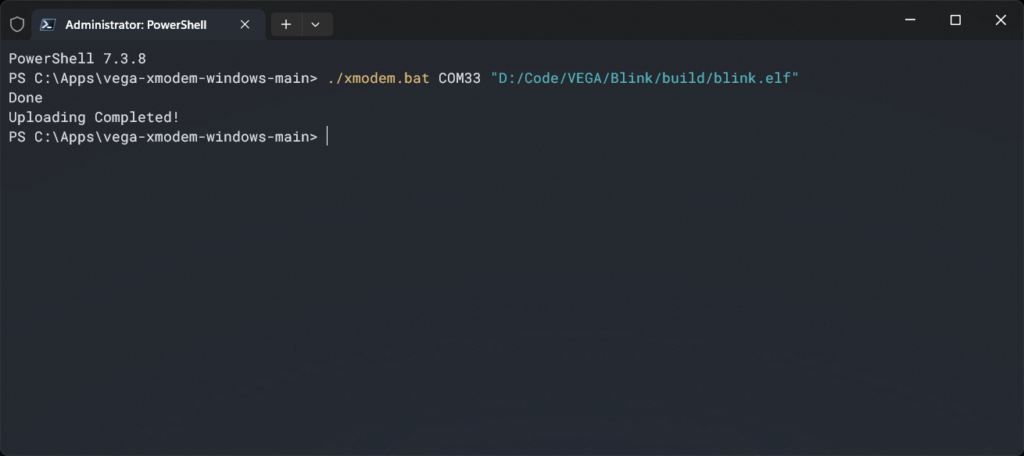
vegaflasher
vegaflasher is a tool from C-DAC for flashing VEGA SoCs when the CPU is booted from an external flash memory. The boot mode and the flashing mode are determined by the state of the 2-pin jumper J12 (BOOT SEL).
- If the BOOT SEL jumper is shorted, the CPU boots from external SPI flash memory. Use vegaflasher for uploading.
- If BOOT SEL is not shorted, the CPU boots from the UART interface. Use vegaxmodem for uploading.
So to use vegaflasher, J12 must be shorted. vegaflasher is available for both Linux and Windows. You can download the Windows version from here. We will save the files to the location C:\Apps\ in our system. You can also clone the project to your computer. Now open a terminal from that folder and run the following command. Make sure the J12 jumper on your board is shorted. Otherwise, this operation will fail.
./flasher.bat COM33 "D:/Code/VEGA/Blink/build/blink.elf"Simply replace the COM port with the COM port on your system and the executable path with your own path. This will upload the firmware to the board, and once completed, the green LED will start to blink. The uploading process can take around 25 seconds to complete. Following is the upload log. Wait until the message "Uploading Completed!" is printed.
PS C:\Apps\vega-flasher-windows-main> ./flasher.bat COM33 "D:/Code/VEGA/Blink/build/blink.elf"
Waiting for Reset.....Done
Uploading Completed!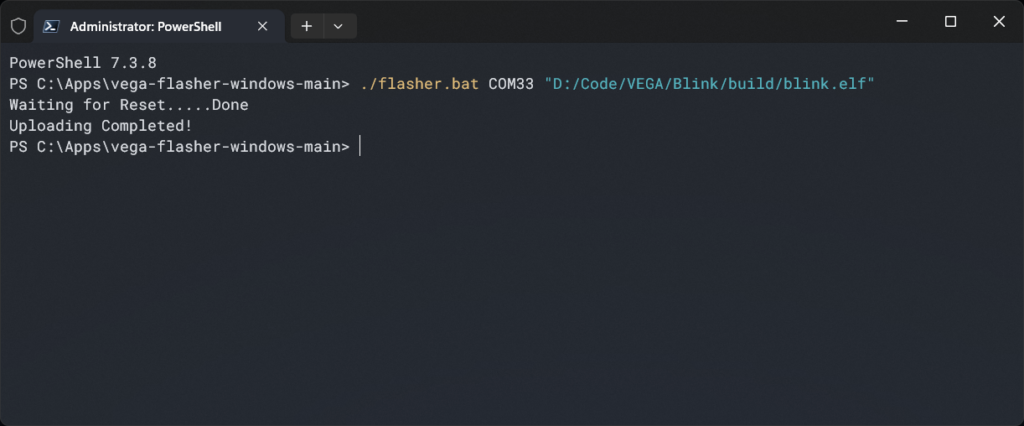
Debugging
Instructions for debugging are not available from C-DAC yet. But THEJAS32 supports the JTAG interface and debugging through GDB and OpenOCD as per the docs. Once the instructions for debugging become available, we will update this section.
Links
- VEGA Taurus SDK by Debayan Sutradhar – GitHub
- vegadude Uploader Tool – GitHub
- VEGA Taurus SDK Examples – GitHub
- Prebuilt RISC-V GNU Toolchain for Windows
- Prebuilt RISC-V GCC Toolchains for Linux
- CMake Build Generator
- Ninja Build System
- Creating a Project with Taurus SDK
- VEGA XMODEM for Windows
- VEGA FLASHER for Windows
- Windows Terminal
- C-DAC Aries V3 – Official Product Page
- Aries V3 – Board Reference Manual [PDF]
- Aries V3 – Board Brochure [PDF]
- VEGA Processor Documentation
- Aries V3 Board Buy – Robu
- VEGA ET1031: 32-bit High-Performance Microcontroller
- VEGA Processor – Official Website
- C-DAC VEGA Software Repository – GitLab
- VEGA THEJAS32 Arduino Package Index – GitLab
- C-DAC VEGA Processor – GitLab
- THEJAS32 Programmers Manual – C-DAC
- VEGA Processors Official Community
Short Link
- Short URL to this page – https://www.circuitstate.com/ariesv3vegasdk



Greetings, I have gone through this amazing Goto tutorial for developing C/C++ applications using the VEGA SDK. I have noticed that for the building and uploading process, the user needs to jump into multiple directories if the uploading tool locations are different from the project directory. So I have created an automation script for project building and uploading firmware into the microcontroller with an interactive command line mode using Makefile and Batchfile.
It allows to build the project by just running “make build” and to upload the firmware in the microcontroller, just run “make upload” Running this command in terminal will ask in which mode the microcontroller to program, and upon choice it will be programmed.
My work is here in this Github repository: https://github.com/nishit0072e/Vega-Firmware-Build-Upload-Automation/tree/main
I request Admin to update this tutorial page with this automation flow to make this tutorial more beginner-friendly and time-efficient.